Adding Push Notifications to a Flutter App using Firebase Cloud messaging
In this tutorial, we are going to learn how to add the push notifications support to a Flutter app using Firebase Cloud Messaging. This tutorial will only deal with configurations in the Android platform.

Push Notifications are a pop-up messaging medium for alerting app users about the whereabouts of the app. They help amplify user engagement in the app. Many users forget about the app on the long run. Push notifications keeps users up-to-date about the app so that they keep coming back to play with the app. Hence, push notifications can be used as a mechanism to retain the interest of users towards the app. It drives traffic and usage back to the app. Firebase Cloud Messaging is a service offered by Firebase that enables sending of notifications messages to the end-users. It allows various configurations to send the notification to the selective audiences based on time and routine. Hence, we are going to make use of it to send the notification alert to our Flutter app. So, let’s get started!
Create a New Flutter Project
First, we need to create a new Flutter project. For that, make sure that the Flutter SDK and other Flutter app development related requirements are properly installed. If everything is properly set up, then in order to create a project, we can simply run the following command in the desired local directory:
flutter create <app-name>
After the project has been set up, we can navigate inside the project directory and execute the following command in the terminal to run the project in either an available emulator or an actual device:
flutter run
Mega Bundle Sale is ON! Get ALL of our React Native codebases at 90% OFF discount 🔥
Get the Mega BundleAfter successfully building the project, we will get the following result in the emulator screen:
Integrate Firebase Configuration into Flutter
In this step, we are going to integrate Firebase services to our Flutter project. But first, we need to create a Firebase project first. The setup guidelines are also provided in the official Firebase
documentation for Flutter. To create a Firebase project, we need to log in to the Firebase and navigate
to the Firebase Console. There we can simply click on ‘Add a project’ to get our project started. At first, a window will appear asking to input the project name. Here, we have kept the project name as
flutterfirebasepush as shown in the screenshot below:

We can continue to the next step until the project has been created. Register Firebase to Android app As the registration process is platform-specific, we are going to register for the Android platform. After having clicked on the Android icon, we will be directed to an interface asking for the Android package name. In order to add the package name of our Flutter project, we need to locate it first. The package name will be available on ./android/app/build.gradle file of your Flutter project. You will see something like:
com.example.flutterfirebasepush
We just need to copy it and paste it to the Android package name input field as shown in the screenshot below:
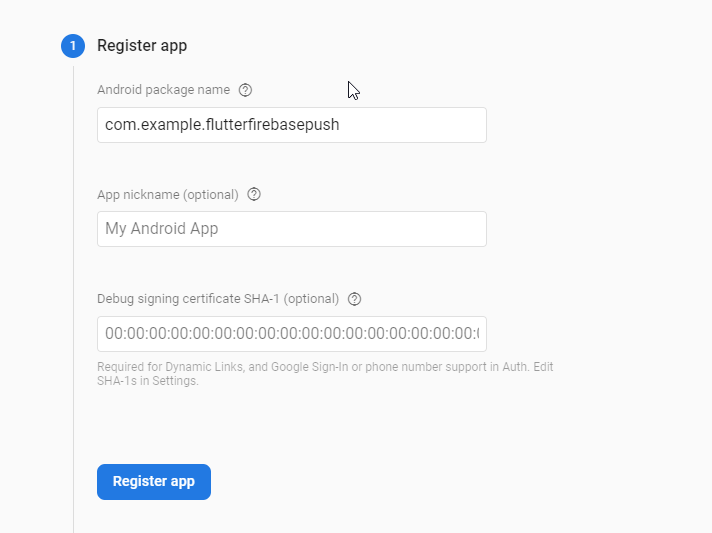
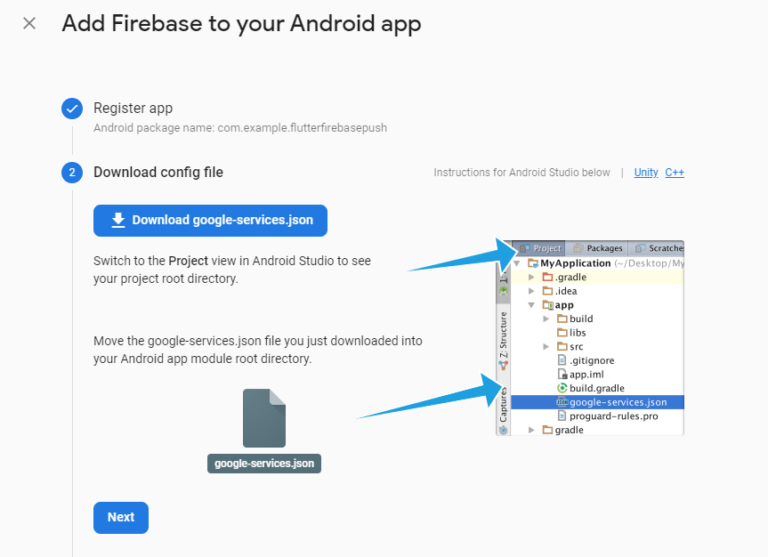
After that, we can simply click on the ‘Register app’ button. It will lead us to the interface where we can get the google-services.json file which will link our Flutter app to Firebase Google services. We need to download the file and move it to the ./android/app directory of our Flutter project. The instructions are also shown in the screenshot below:
Adding Firebase configurations to native files in Flutter project Now in order to enable Firebase services in our Android app, we need to add the google-services plugin to our Gradle files. First, in our root-level (project-level) Gradle file (android/build.gradle), we need to add rules to include the Google Services Gradle plugin. We need to check if the following configurations are available or not:.
buildscript {
  repositories {
    // Check that you have the following line (if not, add it):
    google()  // Google's Maven repository
  }
  dependencies {
    ...
    // Add this line
    classpath 'com.google.gms:google-services:4.3.4'
  }
}
allprojects {
  ...
  repositories {
    // Check that you have the following line (if not, add it):
    google()  // Google's Maven repository
    ...
  }
}
Mega Bundle Sale is ON! Get ALL of our React Native codebases at 90% OFF discount 🔥
Get the Mega BundleNow, in our module (app-level) Gradle file (android/app/build.gradle), we need to apply the Google Services Gradle plugin. For that, we need to add the piece of code highlighted in the following code snippet to the ./android/app/build.gradle file of our project:
def flutterVersionName = localProperties.getProperty('flutter.versionName')
if (flutterVersionName == null) {
    flutterVersionName = '1.0'
}
**apply plugin: 'com.google.gms.google-services'**
apply plugin: 'com.android.application'
apply plugin: 'kotlin-android'
apply from: "$flutterRoot/packages/flutter_tools/gradle/flutter.gradle"
Laslty, we need to add implementation 'com.google.firebase:firebase-messaging:20.1.0' as shown in the code snippet below:
dependencies {
    implementation "org.jetbrains.kotlin:kotlin-stdlib-jdk7:$kotlin_version"
       implementation 'com.google.firebase:firebase-messaging:20.1.0'
}
Next, we need to add an action and a category as an intent-filter within the activity tag in ./android/app/src/main/AndroidManifest.xml file:
<intent-filter>
       <action android:name="android.intent.action.MAIN"/>
        <action android:name="FLUTTER_NOTIFICATION_CLICK" />
       <category android:name="android.intent.category.LAUNCHER"/>
   </intent-filter>
Install Flutter Firebase Messaging package
Here, we are going to make use of the firebase_messaging package. For that, we need to add the plugin to the dependency section of pubspec.yaml file. We need to add the following line of code to the dependencies section:
firebase_messaging: ^7.0.3
Next, we need to import the package to main.dart file:
import 'package:flutter/material.dart';
import 'package:firebase_messaging/firebase_messaging.dart';
Listening to new notifications
Now, inside the MyHomePage stateful widget class of the main.dart file, we need to initialize the FirebaseMessaging instance and some constants as shown in the code snippet below:
class _MyHomePageState extends State<MyHomePage> {
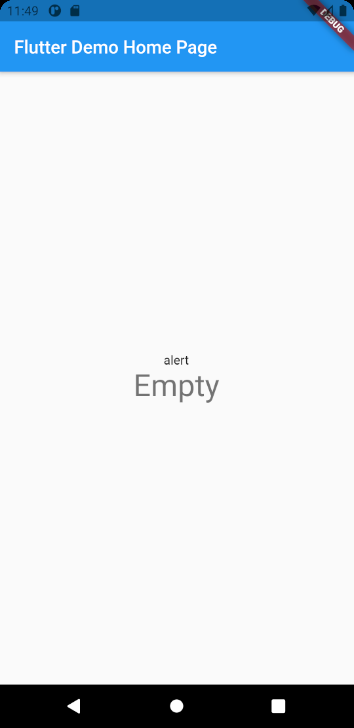
String messageTitle = "Empty";
String notificationAlert = "alert";
FirebaseMessaging _firebaseMessaging = FirebaseMessaging();
The messageTitle variable will receive the notification message title and notificationAlert will be assigned the action done once the notification comes up.
Now, we need to apply these variables to the build function inside the Scaffold widget body as shown in the code snippet below:
mainAxisAlignment: MainAxisAlignment.center,
          children: <Widget>[
           Text(
              notificationAlert,
            ),
            Text(
              messageTitle,
              style: Theme.of(context).textTheme.headline4,
            ),
          ],
        ),
Sending Test Notifications from Firebase Console
Next, we need to configure the code to receive the notification and use the notification message to display it on the screen.
For that, we need to add the code from the following code snippet in the initState function:
void initState() {
// TODO: implement initState
super.initState();
_firebaseMessaging.configure(
onMessage: (message) async{
setState(() {
messageTitle = message["notification"]["title"];
notificationAlert = "New Notification Alert";
});
},
onResume: (message) async{
setState(() {
messageTitle = message["data"]["title"];
notificationAlert = "Application opened from Notification";
});
},
);
}
Here, we have used the configure method provided by _firebaseMessaging instance which in turn provides the onMessage and onResume callbacks.
These callbacks provide the notification message as a parameter. The message response will hold the notification object as a map object.
The onMessage function triggers when the notification is received while we are running the app. The onResume function triggers when we receive
the notification alert in the device notification bar and open the app through the push notification itself. In this case, the app can be running
in the background or not running at all. Hence, we are all equipped with the Flutter app. Now, we just need to configure a message in the Firebase
Cloud Messaging and send it to the device. Now, we need to go to the Firebase Cloud Messaging console and start creating a new message as directed
in the screenshot below:
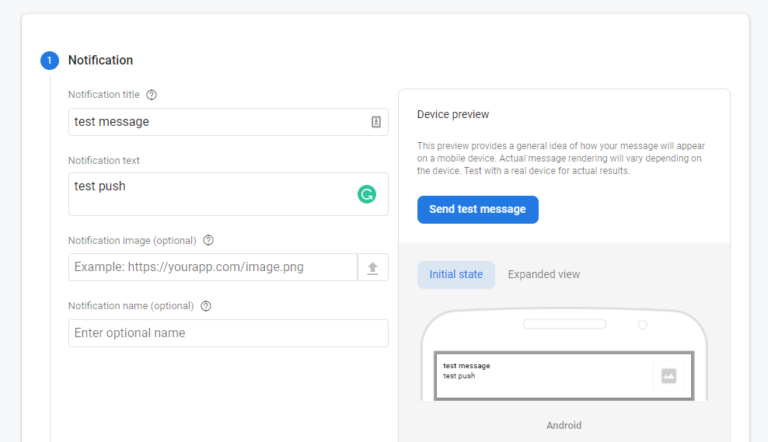
Here, we can enter the title, text, image, and name of the notification. The title will set here will be provided as the title in the message object on
the callbacks we set before in the Flutter project. After setting the required fields, we can click on ‘Next’ which will lead us to the following window:
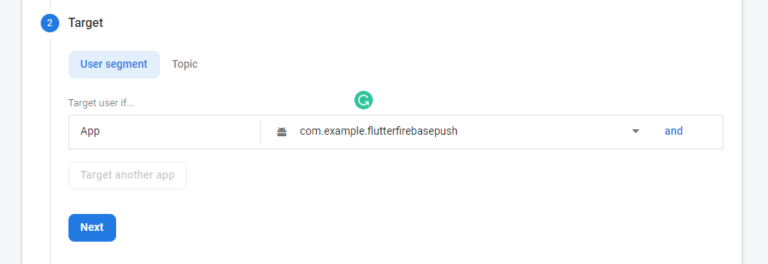
Here, we need to provide our target app and click on ‘Next’. Lastly, a window to enter the custom data will appear in which we can set the title and click_action.
This click action event is triggered whenever we click on the notification that appears in the notification bar of the device. After clicking on the notification
message from the notification bar, the app will open and the onResume callback will trigger setting title as assigned in the custom data in the screenshot below:

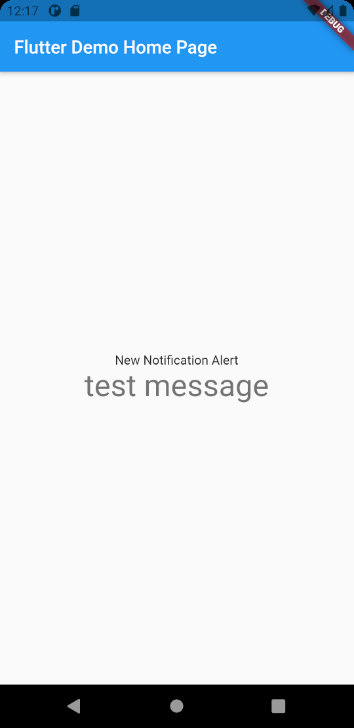
Now, we are ready to send for the first notification message to the device. First, let us try it with the device running in the emulator. As we click on the ‘Review’ button and send the message, we will get the following result in the Cloud Messaging console as well as the emulator:
Now let us try with the app running in the background. As we send the message from the console, we will get the result as demonstrated in the demo below:
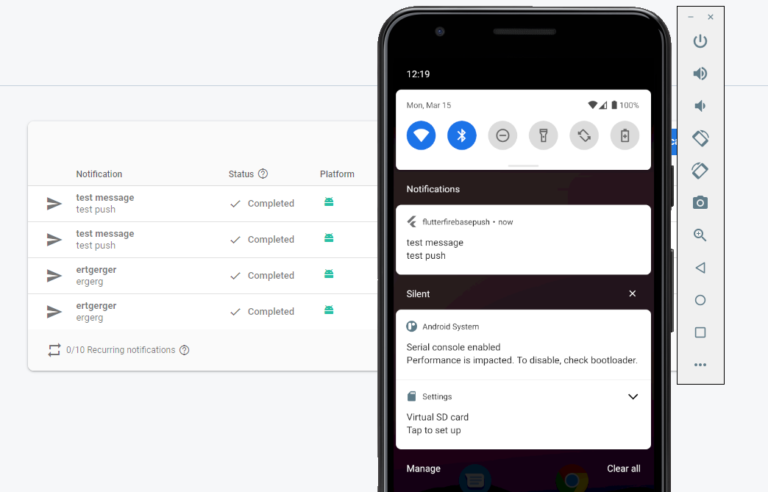
Here, as soon as we sent the message, we receive a push notification in the notification bar of the device. Then, as we drag down the notification bar,
we can see the notification message title and text. And, by clicking on the notification message, we can launch the application and display the custom data on the screen.
This ensures that our onResume callback was triggered. Finally, we have successfully added the push notification feature in the Flutter application using Firebase Cloud Messaging.
Looking for a custom mobile application?
Our team of expert mobile developers can help you build a custom mobile app that meets your specific needs.
Get in TouchConclusion
Push notifications are an essential medium for the app to communicate with its userbase. They can be used to alert users in the various happenings of the app as well as be the core medium to drive users’ interest back to the app. The Firebase Cloud Messaging has made the sending of notification alerts much simpler and easier. In this tutorial, we learned all the basic requirements and configurations to send the push notification to a Flutter app using Firebase Cloud Messaging. The availability of a Firebase messaging package for Flutter also made it easy to receive the notifications and show them in the Flutter app interface.