This article is going to focus on discussing the many ways in which gradients may be implemented in Flutter. Flutter makes the use of gradients far simpler than it ever has been before, which is significant given that gradients have the power to make an application seem amazing.
Note: If you aren’t familiar with Flutter, you may get a better understanding of it by reading some of the prior posts that we’ve made on the topic.
Project Setup
Let’s get started utilizing some gradients! Create a brand new Flutter project to get things rolling:
# Start a whole new project in Flutter
$ flutter create gradients
# Open project in VS Code
$ code .
Now, let’s make use of this code to get our application up and running:
import 'package:flutter/material.dart';

void main() => runApp(const MyApp());

class MyApp extends StatelessWidget {
  const MyApp({super.key});

  @override
  Widget build(BuildContext context) {
    return MaterialApp(
      title: 'Flutter Gradients',
      home: Scaffold(
        backgroundColor: Colors.blueGrey,
        appBar: AppBar(
          title: const Text('Flutter Gradients'),
        ),
        body: const Center(
          child: Text(
            'Gradients are cool!',
            style: TextStyle(
              fontSize: 35,
              color: Colors.white,
            ),
          ),
        ),
      ),
    );
  }
}
In addition to the Center and Text widgets that we can see, we’ve styled our Container in the way that you see fit. The AppBar also has a title.
Assign a BoxDecoration.
A BoxDecoration may be used in Flutter to create gradients by accessing the decorating attribute of our Container widget. Let’s try it this way:
body: Container(
  decoration: const BoxDecoration(),
  child: const Center(
    child: Text(
      'Gradients are cool!',
      style: TextStyle(
        fontSize: 35,
        color: Colors.white,
      ),
    ),
  ),
),
Great. We may now begin working on our gradient. In Flutter, you may choose between using a linear gradient, a radial gradient, or a sweep gradient. These are the three types of gradients accessible. In this post, we will discuss all three of these topics.
Now, Creating a LinearGradient
To begin with, we’ll add a linear gradient to our program:
body: Container(
  decoration: const BoxDecoration(
      gradient: LinearGradient(
          colors: [Colors.green, Colors.blue])
  ),
  child: const Center(
    child: Text(
      'Gradients are cool!',
      style: TextStyle(
        fontSize: 35,
        color: Colors.white,
      ),
    ),
  ),
),
We’ve added a gradient attribute to our BoxDecoration, which allows us to utilize the LinearGradient widget. We’ve added the color attribute to our LinearGradient widget and assigned it the values blue and green. Let’s check out the result:
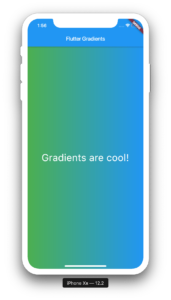
Great! We now have a green-to-blue gradient as a result of our efforts. Our app has already begun to improve in appearance. Start by looking at some of the attributes that we may give to our LinearGradient.
Adding the begin and end attributes allows us to alter the gradient’s start and finish points. Now let’s see if we can create a gradient that extends from the top left to bottom right throughout the whole display.
body: Container(
  decoration: const BoxDecoration(
      gradient: LinearGradient(
          begin: Alignment.topLeft,
          end: Alignment.bottomRight,
          colors: [Colors.green, Colors.blue])),
  child: const Center(
    child: Text(
      'Gradients are cool!',
      style: TextStyle(
        fontSize: 35,
        color: Colors.white,
      ),
    ),
  ),
),
Let’s see how we introduced the begin and end properties with their Alignment values in the code above. topLeft and Alignment are two terms used to describe the same thing. bottomRight. This should alter the alignment of the gradient. Now, let’s have a look at our software:
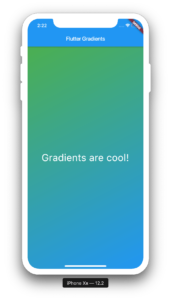
This looks much better. At this point, we have a gradient that has been aligned correctly and looks fantastic.
The next item that we are going to look at is how to use radial gradients in Flutter.
Radial Gradient
Radial Gradients are relatively similar to Linear Gradients in the sense that they take in qualities such as colors and stops, but in addition to this, they take in properties such as radius, focal, and tileMode. Linear Gradients, on the other hand, only take in attributes such as colors and stops. Let’s incorporate a radial gradient into our application:
body: Container(
  decoration: const BoxDecoration(
    gradient: RadialGradient(colors: [Colors.green, Colors.blue]),
  ),
  child: const Center(
    child: Text(
      'Gradients are cool!',
      style: TextStyle(
        fontSize: 35,
        color: Colors.white,
      ),
    ),
  ),
),
As can be seen, the implementation of a radial gradient is a relatively straightforward process. Take a look at our application, which is as follows:
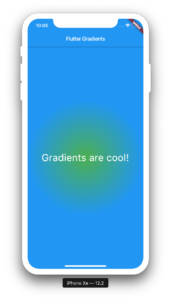
Great! We can see that our gradient is functioning properly and has the form of a circle; this is how it got its name, radial. Assigning some characteristics to our gradient now, let’s make an effort to alter its look and see what happens.
To begin, we will be including the stops property as well as some more color options.
body: Container(
  decoration: const BoxDecoration(
    gradient: RadialGradient(
        colors: [Colors.green, Colors.blue, Colors.orange, Colors.pink],
        stops: [0.2, 0.5, 0.7, 1]),
  ),
  child: const Center(
    child: Text(
      'Gradients are cool!',
      style: TextStyle(
        fontSize: 35,
        color: Colors.white,
      ),
    ),
  ),
),
Take a look at the results of that, shall we?
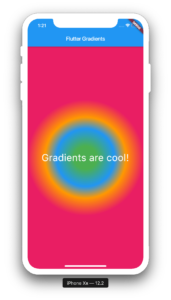
A gradient with several colors has now been created for us. Sweep gradients are the subject of our next Flutter tutorial.
Sweep gradient
A sweep gradient is a combination of startAngle and endAngle attributes, identical to the other two gradients. Let’s add a color and several stops to our application’s sweeping gradient:
body: Container(
  decoration: const BoxDecoration(
    gradient: SweepGradient(
      colors: [
        Colors.blue,
        Colors.green,
        Colors.yellow,
        Colors.red,
        Colors.blue
      ],
      stops: [0.0, 0.25, 0.5, 0.75, 1],
    ),
  ),
  child: const Center(
    child: Text(
      'Gradients are cool!',
      style: TextStyle(
        fontSize: 35,
        color: Colors.white,
      ),
    ),
  ),
),
Here is a glance at our application:
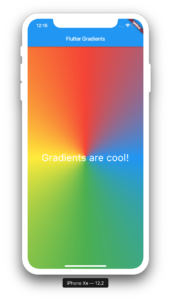
That’s awesome. The startAngle and endAngle attributes of sweep gradients allow us to create some really amazing effects. Let’s play about a bit:
body: Container(
  decoration: const BoxDecoration(
    gradient: SweepGradient(colors: [
      Colors.blue,
      Colors.green,
      Colors.yellow,
      Colors.red,
      Colors.blue
    ], stops: [
      0.0,
      0.25,
      0.5,
      0.75,
      1
    ], startAngle: 0.5, endAngle: 1),
  ),
  child: const Center(
    child: Text(
      'Gradients are cool!',
      style: TextStyle(
        fontSize: 35,
        color: Colors.white,
      ),
    ),
  ),
),
Look at what our app looks like now.

On our screen, you can see that we’ve generated a rainbow effect. In Flutter, gradients may be used in a variety of ways, and this is just one of them.
Flutter’s gradients may be created in three different ways: as a Linear Gradient, Radial Gradient, or as Sweep Gradient, as seen above. We’ve also learned how to change the appearance of our gradients by changing the characteristics we give them.
Keep up the good work and don’t forget to sign up for our upcoming tutorials.