How to Generate Haptic Feedback in Flutter
Understanding Haptic Feedback
The device reacts to the user’s taps on the screen by performing the appropriate action. The reaction provided by the gadget is referred to as haptic feedback. In many cases, the purpose of haptic feedback is to alert the user whenever an action is performed or an event is clicked.
Various Flutter Haptic Feedback Types:
- HeavyImpact: Inputs haptic feedback in response to a collision with a large object.
- MediumImpact: Provides haptic sensation in line with a collision contact with a medium mass.
- LightImpact: Using LightImpact, you may feel the impact of a light mass on your hand.
- Vibrate: It vibrates for a brief period of time to provide the user with haptic feedback.
- SelectionClick: A haptic feedback is provided to show that the selection is moving from one discrete value to another.
How to Use Flutter’s Haptic Feedback Feature
In order to begin, Go ahead and create a flutter project. Three classes must be created: main.dart, home.dart, and second.dart.
main.dart Code
import 'package:flutter/material.dart';
import 'home.dart';
void main() {
runApp(const MyApp());
}
class MyApp extends StatelessWidget {
const MyApp({super.key});
// This widget is the root of your application.
Widget build(BuildContext context) {
return const MaterialApp(
debugShowCheckedModeBanner: false,
home: MyHomePage(),
);
}
}
The root of the application was constructed using a stateless widget in this manner. Because we don’t want to burden our app’s main thread, we don’t code here.
home.dart Code
import 'package:flutter/material.dart';
import 'package:flutter/services.dart';
import 'second.dart';
class MyHomePage extends StatefulWidget {
const MyHomePage({super.key});
State<MyHomePage> createState() => _MyHomePageState();
}
class _MyHomePageState extends State<MyHomePage> {
//"space" used for space between widgets
final space = const SizedBox(height: 30);
Widget build(BuildContext context) {
return Scaffold(
backgroundColor: Colors.greenAccent,
appBar: AppBar(
title: const Text("Haptic Feedback"),
backgroundColor: Colors.indigo,
elevation: 2,
),
body: SingleChildScrollView(
child: Padding(
padding: const EdgeInsets.all(8.0),
child: Center(
child: Column(
mainAxisAlignment: MainAxisAlignment.spaceAround,
children: [
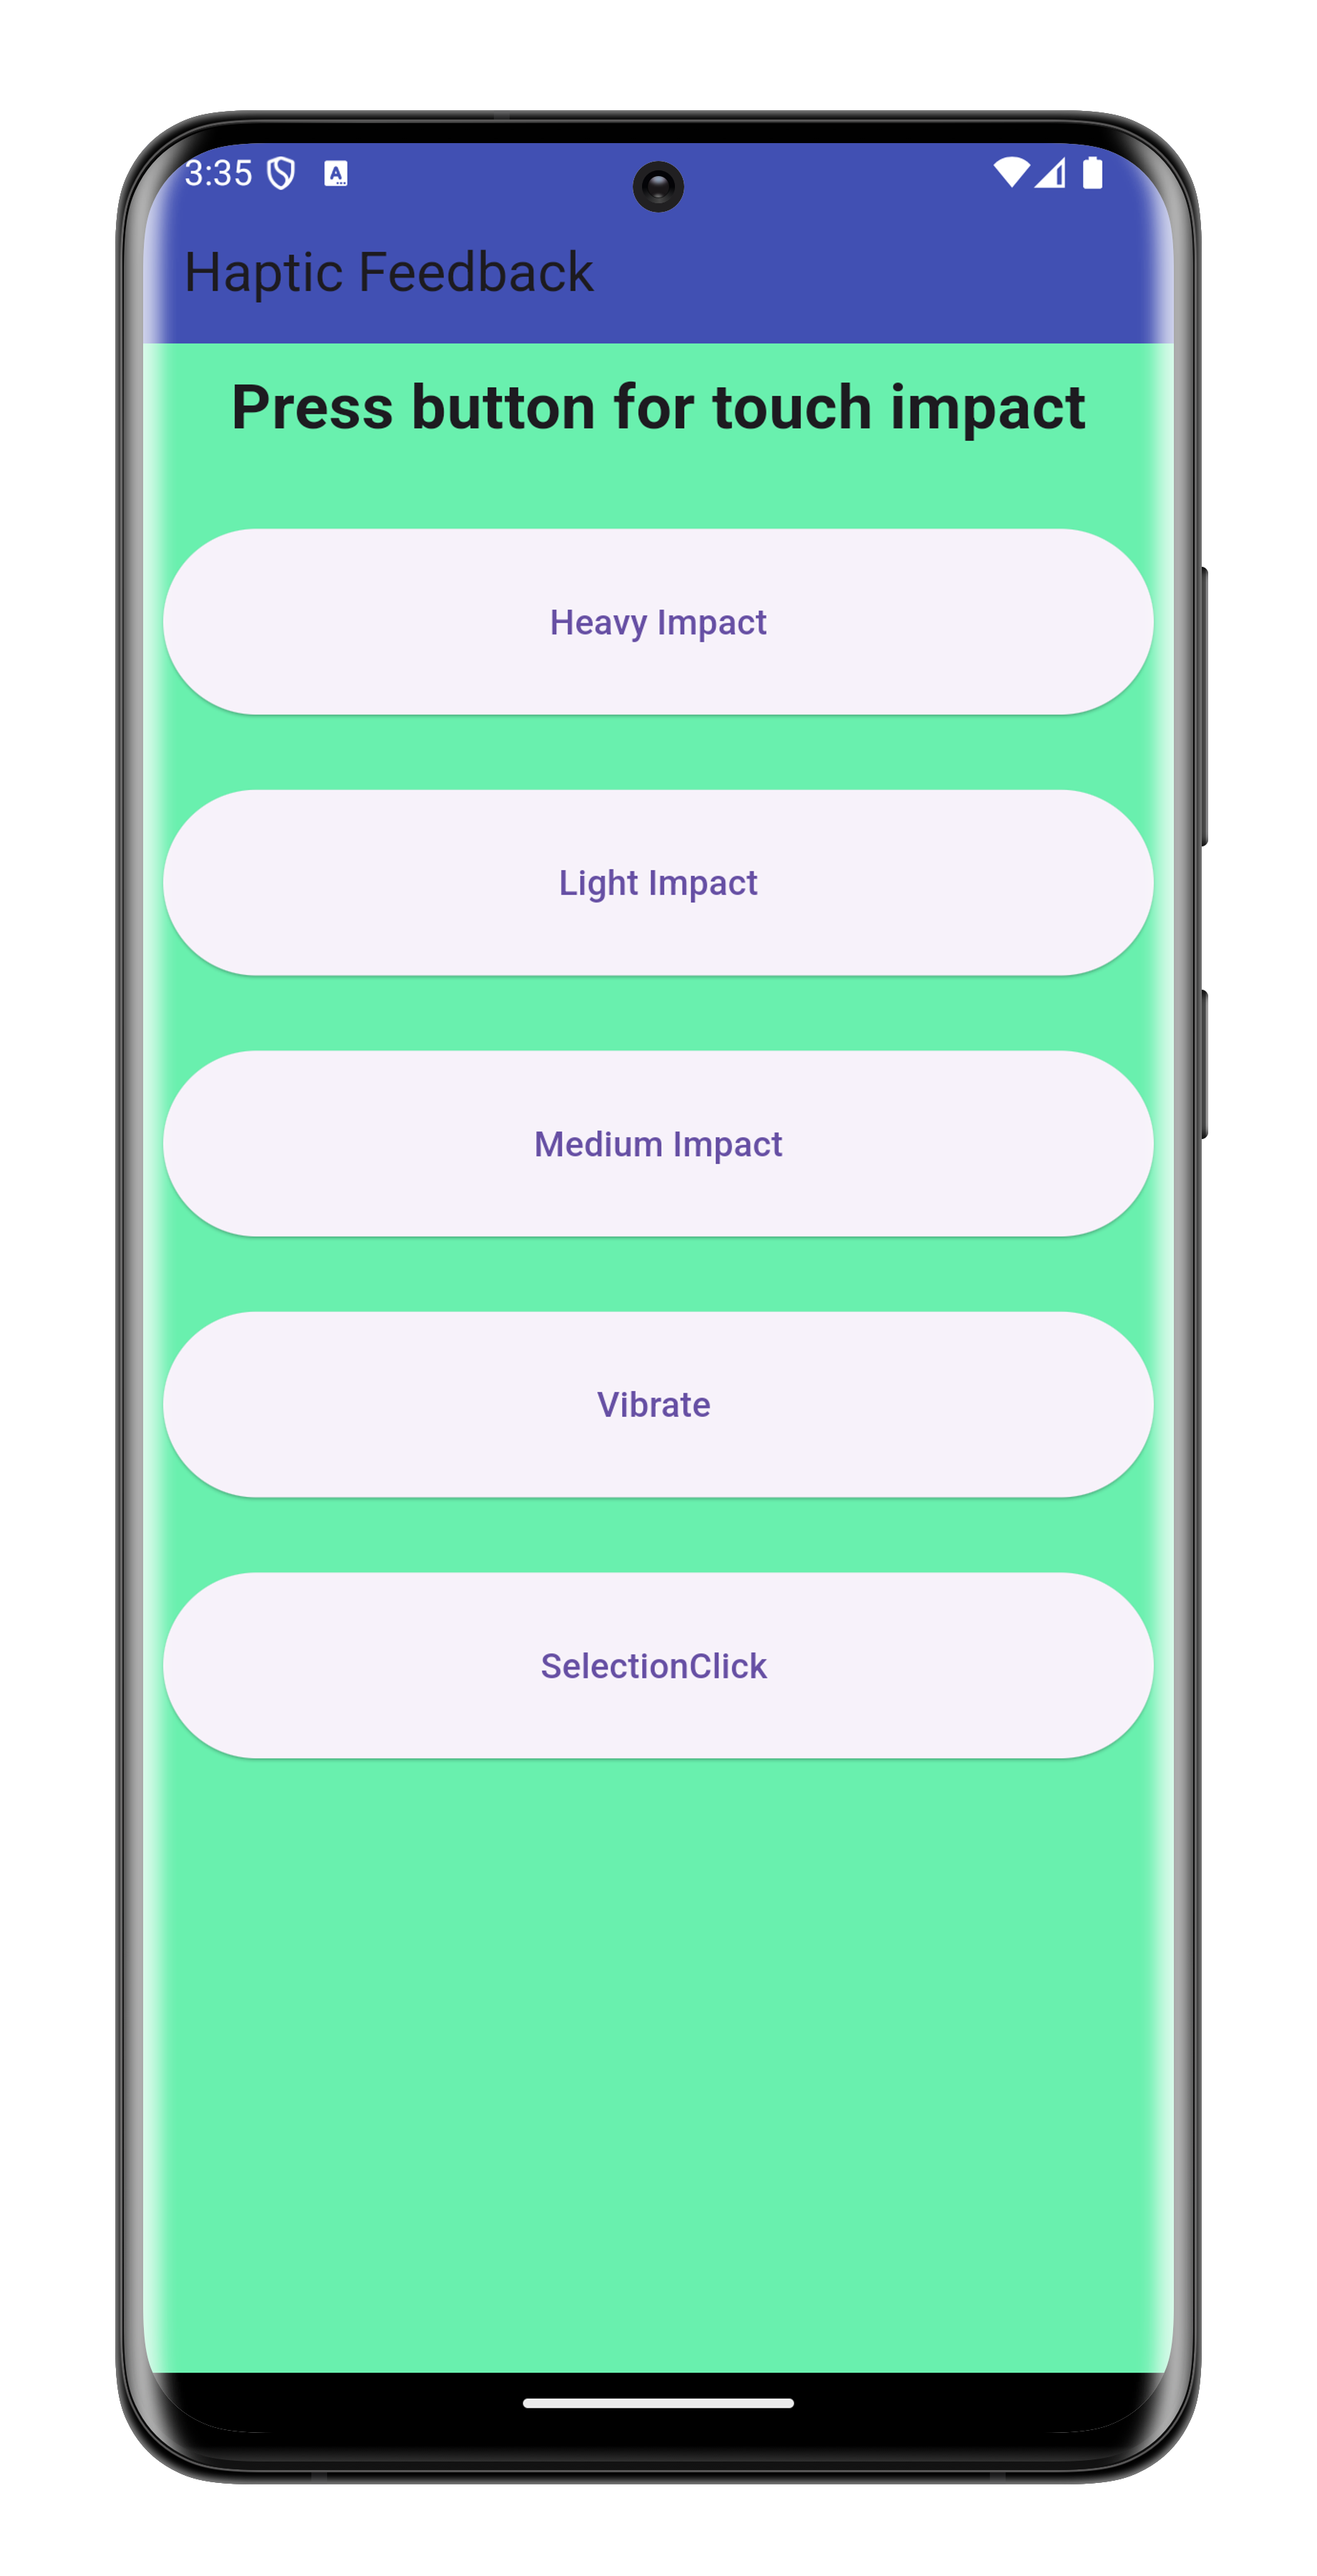
const Text(
"Press button for touch impact",
style: TextStyle(fontSize: 25, fontWeight: FontWeight.bold),
),
space,
// Buttons wrapped in containers
SizedBox(
width: MediaQuery.of(context).size.width,
height: MediaQuery.of(context).size.height / 12,
child: ElevatedButton(
child: const Text("Heavy Impact"),
onPressed: () {
HapticFeedback.heavyImpact();
Navigator.push(
context,
MaterialPageRoute(
builder: (context) => const SecondPage(),
),
);
},
),
),
space,
SizedBox(
width: MediaQuery.of(context).size.width,
height: MediaQuery.of(context).size.height / 12,
child: ElevatedButton(
child: const Text("Light Impact"),
onPressed: () {
HapticFeedback.lightImpact();
Navigator.push(
context,
MaterialPageRoute(
builder: (context) => const SecondPage(),
),
);
},
),
),
space,
SizedBox(
width: MediaQuery.of(context).size.width,
height: MediaQuery.of(context).size.height / 12,
child: ElevatedButton(
child: const Text("Medium Impact"),
onPressed: () {
HapticFeedback.mediumImpact();
Navigator.push(
context,
MaterialPageRoute(
builder: (context) => const SecondPage(),
),
);
},
),
),
space,
SizedBox(
width: MediaQuery.of(context).size.width,
height: MediaQuery.of(context).size.height / 12,
child: ElevatedButton(
child: const Text("Vibrate "),
onPressed: () {
HapticFeedback.vibrate();
Navigator.push(
context,
MaterialPageRoute(
builder: (context) => const SecondPage(),
),
);
},
),
),
space,
SizedBox(
width: MediaQuery.of(context).size.width,
height: MediaQuery.of(context).size.height / 12,
child: ElevatedButton(
child: const Text("SelectionClick "),
onPressed: () {
HapticFeedback.vibrate();
Navigator.push(
context,
MaterialPageRoute(
builder: (context) => const SecondPage(),
),
);
},
),
),
],
),
),
),
),
);
}
}
As you can see, we have developed a user interface (UI) that includes buttons that provide haptic feedback. Now, when the button is pressed by the user, it will reply appropriately. This kind of reaction is referred to by its technical name, haptic feedback.
second.dart Code
import 'package:flutter/material.dart';
class SecondPage extends StatelessWidget {
const SecondPage({super.key});
Widget build(BuildContext context) {
return Scaffold(
appBar: AppBar(title: const Text("Second Page")),
body: Center(
child: ElevatedButton(
child: const Text("Back to Home"),
onPressed: () {
Navigator.pop(context);
},
),
),
);
}
}
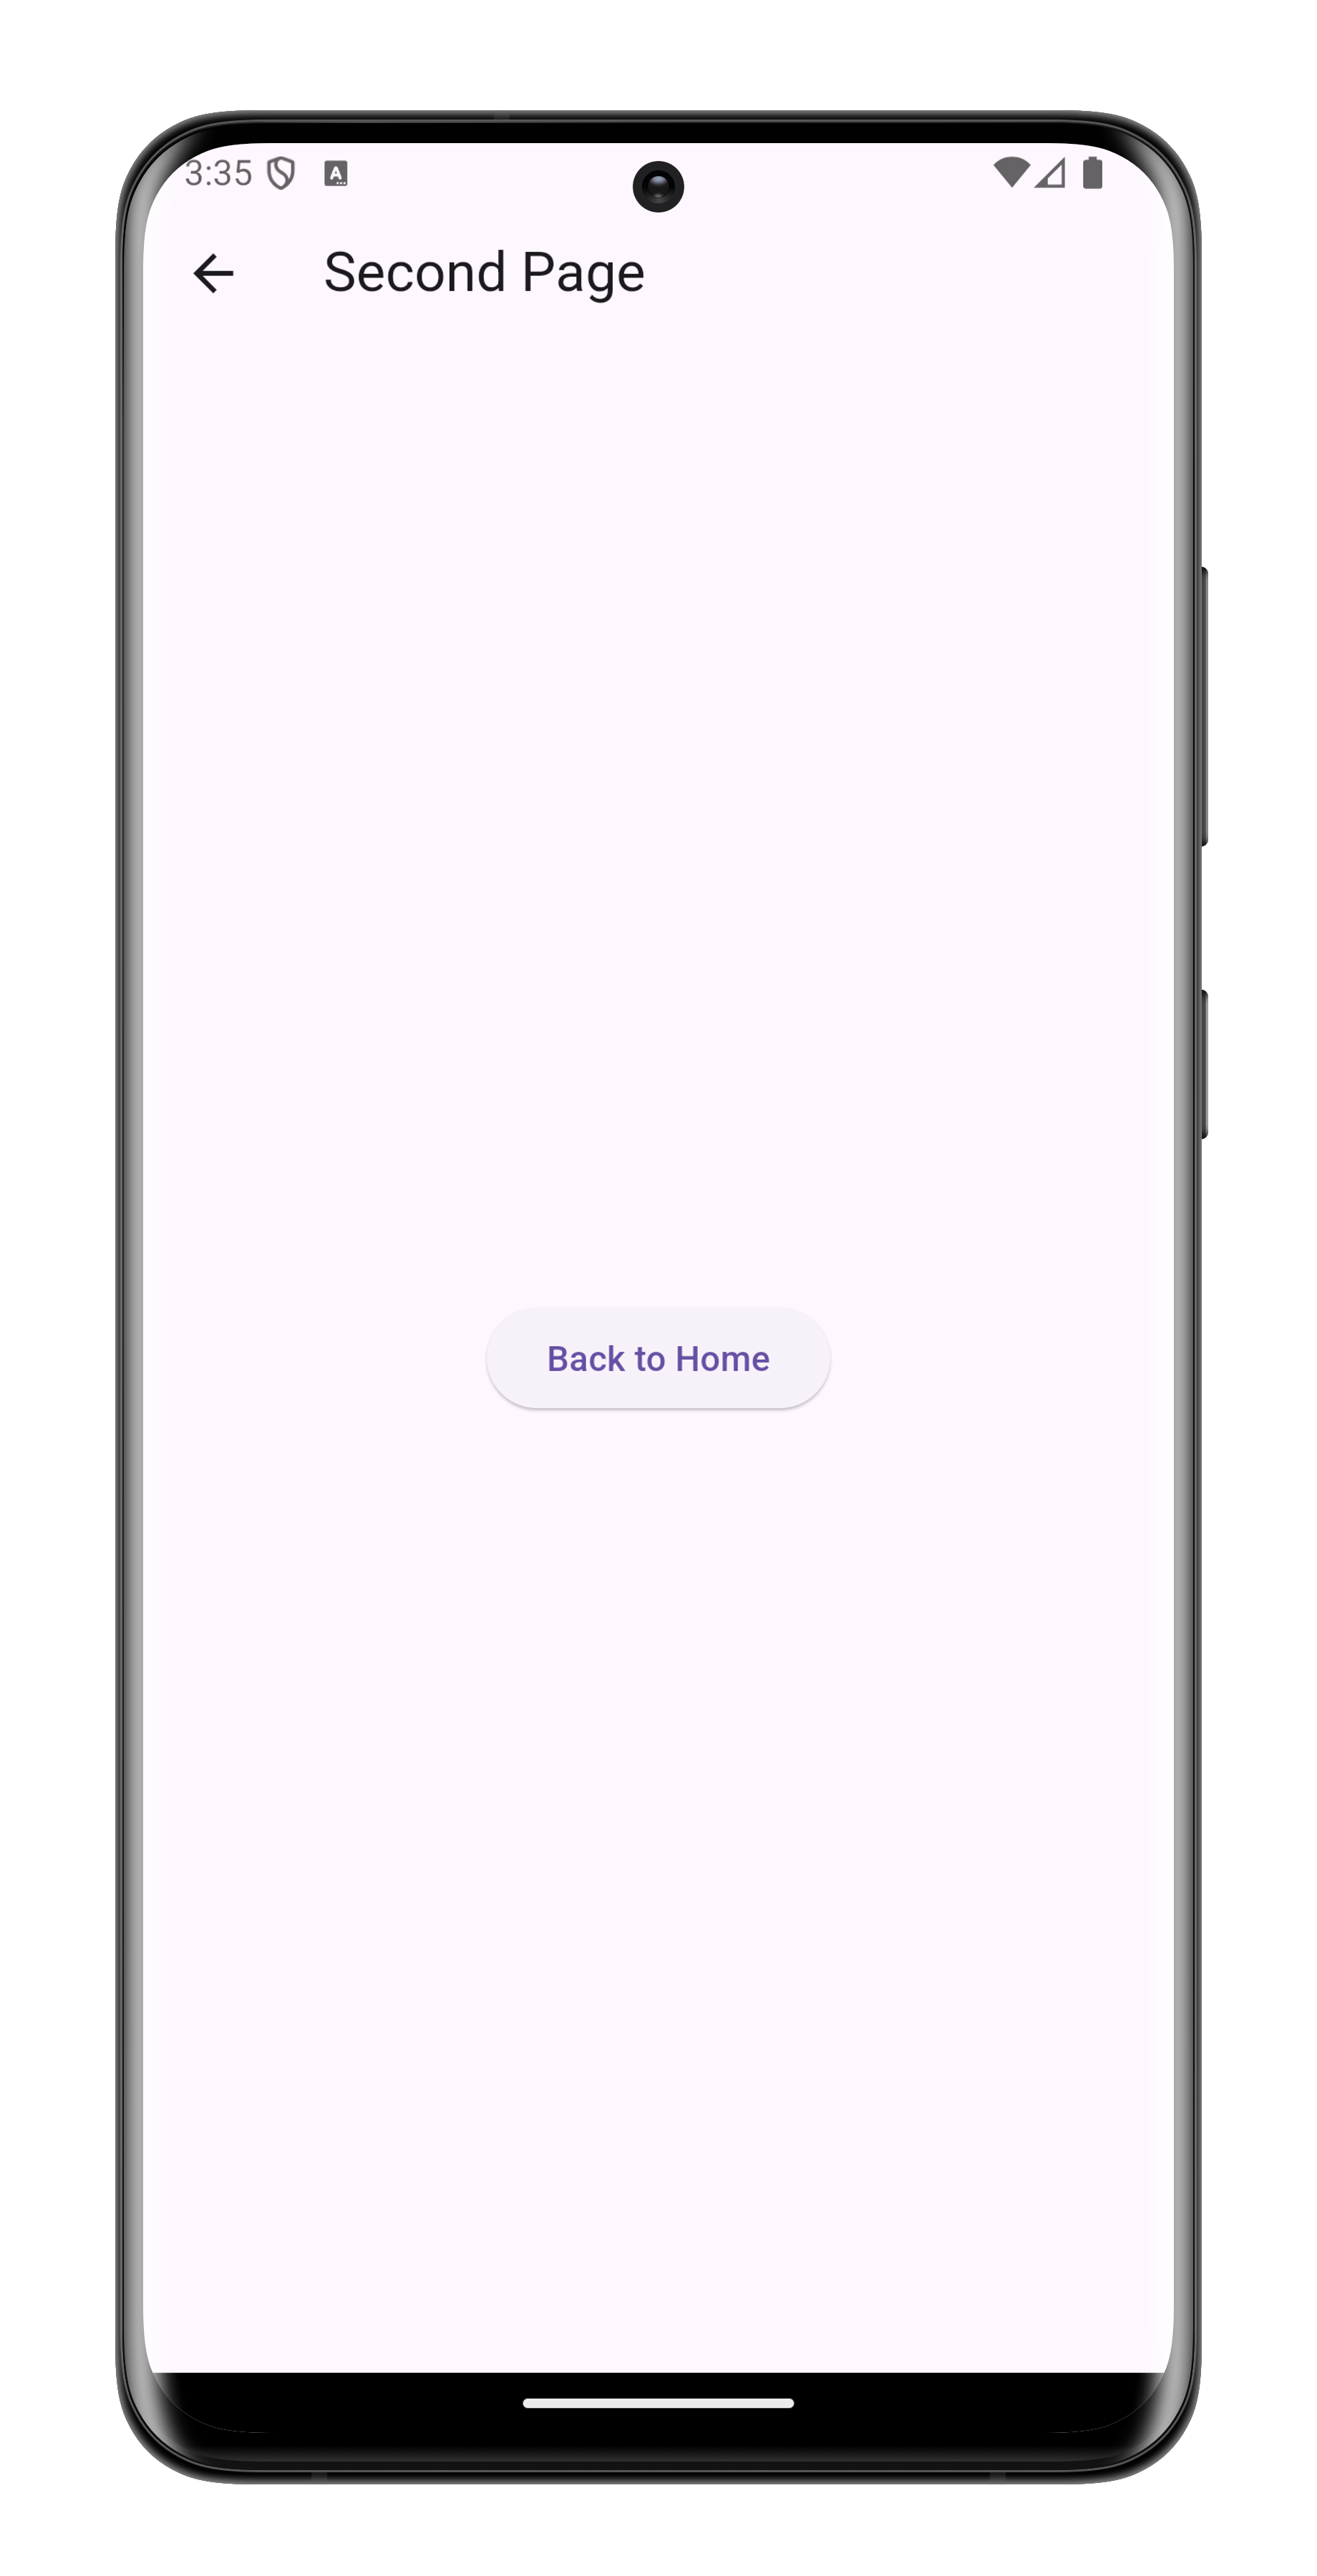
When the user clicks the button on this page, they will be sent from the home page to the second page. This is the third and last screen that I have designed for the user interface.
The pictures on the screen will be seen here.
We hope that reading this blog will help you learn more about haptic feedback utilizing Flutter and that you will be able to put your newfound knowledge into practice. Happiness for All Those who Learn.