In today’s applications, audio recording is a common function that is often utilized. Recording audio has become an integral part of modern life, from programs that enable users to record and take notes during meetings or lectures, learn a new language, make podcasts, and more. It’s equally as crucial to have an audio-playing function. Music applications, podcasts, games, and alerts are all examples of how this technology is being leveraged to alter how we engage with our favorite apps on the go. Adding audio recording and playback functionality to a Flutter app is covered in this article so you may design your own audio-based contemporary applications.
Make sure you have the following before proceeding with the tutorial: (1) Flutter was set up. (2) Xcode or Android Studio must be installed on your computer.
Making a new Flutter app from scratch and configuring it
To begin, let’s create a new Flutter app with the following command:
flutter create appname
Flutter sound and assetsaudio player are the tools we’ll be using to record and playback audio in this tutorial. Navigate to main.dart in the freshly generated Flutter app in your favorite code editor. Setting debugShowCheckedModeBanner to false will disable the debug mode banner.
    return MaterialApp(
      debugShowCheckedModeBanner: false,
      title: 'Flutter Demo',
      theme: ThemeData(
        primarySwatch: Colors.blue,
      ),
      home: MyHomePage(title: 'Flutter Demo Home Page'),
    );
  }
This class, MyHomePageState, will house all of our functionality. Set the page’s background color to Colors.black87 in its construction procedure. This results in a black backdrop with 87 percent opacity on our website. We can also give our AppBar a name:
backgroundColor: Colors.black87,
appBar: AppBar(title: Text('Audio Recording and Playing')),
Making the Flutter audio app more user-friendly
It is common for recorders to feature built-in timers that read for the duration of the audio recording. The timer functionality may be added to our app by adding a Container widget to the app’s body. The recording timer will be shown in a Text widget that is a child of this one. In TextStyle, we’ll style the timer text as well:
 body: Center(
        child: Column(
          mainAxisAlignment: MainAxisAlignment.start,
          children: <Widget>[
            Container(
              child: Center(
                child: Text(
                  _timerText,
                  style: TextStyle(fontSize: 70, color: Colors.red),
                ),
              ),
            ),
Here, _timerText will receive the timer through a function that we’ll write as we go along.
Starting and Stopping Recording
After that, we’ll add two buttons to start and stop recording. The first step is to provide some vertical space between the timer text and the two buttons by creating a sized box. We’ll use a Row widget since the buttons will all be on the same line. Flutter’s ElevatedButton widget will be used to create all of the buttons on this page. Each button, on the other hand, will include a distinctive icon, text, and background color. It makes sense to construct a widget with all the attributes common to the two buttons we’ll be creating and then add arguments to pass in their own properties. For our start and stop buttons, we’ll use the widget createElevatedButton, which we’ll call and provide the specific characteristics for:
 ElevatedButton createElevatedButton(
      {IconData icon, Color iconColor, Function onPressFunc}) {
    return ElevatedButton.icon(
      style: ElevatedButton.styleFrom(
        padding: EdgeInsets.all(6.0),
        side: BorderSide(
          color: Colors.red,
          width: 4.0,
        ),
        shape: RoundedRectangleBorder(
          borderRadius: BorderRadius.circular(20),
        ),
        primary: Colors.white,
        elevation: 9.0,
      ),
      onPressed: onPressFunc,
      icon: Icon(
        icon,
        color: iconColor,
        size: 38.0,
      ),
      label: Text(''),
    );
  }
This widget needs three attributes at all times: the icon, the icon’s color, and the action performed when the button is pressed. A red border with a width of 4px surrounds the widget, which has 6-pixel padding on all sides. A 15-pixel border-radius was also added. The main color is white, with a box shadow elevation of 9. The widget’s onPressed function is whatever is supplied to it as onPressFunc. If an icon is supplied to it, it will have a size of 38px and will use the color specified in the iconColor parameter. We can now utilize the createElevatedButton widget for our startRecording and stopRecording buttons since it has been configured. With the createElevatedButton widget, a mic icon, a red color, and a onPressed method called startRecording, we can add our startRecording button to the row we just built. This feature will be added at a later date. CreateElevatedButton widget, sending the stop icon to it, and giving it a white color with a onPressed method called stopRecording, which we’ll construct later.
Row(
              mainAxisAlignment: MainAxisAlignment.center,
              children: <Widget>[
                createElevatedButton(
                  icon: Icons.mic,
                  iconColor: Colors.red,
                  onPressFunc: startRecording,
                ),
                SizedBox(
                  width: 30,
                ),
                createElevatedButton(
                  icon: Icons.stop,
                  iconColor: Colors.red,
                  onPressFunc: stopRecording,
                ),
              ],
            ),
Playing the recorded audio
A playback button is necessary now that we have the controls for beginning and pausing the recording and erasing it from the hard drive. Using a SizedBox widget with its height set to 20px, we can create some vertical space between the row we just constructed and the button we are going to make. In addition to playing and stopping recorded audio, this button may be used for both purposes. We need a boolean in order to switch between these two functions. It will be named play audio and set to false by default:
bool _playAudio = false;
If the value is false, no audio will be played; if the value is true, audio will be played.
The next step would be to add a function called onPressed to an ElevatedButton with an elevation of 9 and a red background color. As a result of using the setState method, we may switch between the two boolean values whenever the button is pushed.
 SizedBox(
              height: 20,
            ),
            ElevatedButton.icon(
              style:
                  ElevatedButton.styleFrom(elevation: 9.0,
                  primary: Colors.red),
              onPressed: () {
                setState(() {
                  _playAudio = !_playAudio;
                });
                if (_playAudio) playFunc();
                if (!_playAudio) stopPlayFunc();
              },
              icon: _playAudio
                  ? Icon(
                      Icons.stop,
                    )
                  : Icon(Icons.play_arrow),
              label: _playAudio
                  ? Text(
                      "Stop",
                      style: TextStyle(
                        fontSize: 28,
                      ),
                    )
                  : Text(
                      "Play",
                      style: TextStyle(
                        fontSize: 28,
                      ),
                    ),
            ),
The playFunc function is called if the current value is false, indicating that audio is not presently playing. StopPlayFunc is called if the value is true, which indicates that audio is presently playing and the button is pushed; we’ll write these two functions below. It is important that we show a stop symbol on the button that reads “stop” while the audio is playing. A play icon and “play” text will appear on the button when the audio is no longer playing.
Installing packages for the Flutter audio app
The next step is to set up our app’s audio recording and playback functionality by installing the necessary packages. Add them to the dependencies section of the pubspec.yaml file.
dependencies:
  flutter_sound: ^8.1.9
  assets_audio_player: ^3.0.3+3
Now, we can go to our main.dart file and import the packages to use in our app:
import 'package:flutter_sound/flutter_sound.dart';
import 'package:assets_audio_player/assets_audio_player.dart';
The first step is to create an instance of each:
  FlutterSoundRecorder _recordingSession;
  final recordingPlayer = AssetsAudioPlayer();
The route to the recorded audio, which is the place on the phone where the recorded audio is stored, is required in order to playback an audio file. For this, we’ll construct a variable called.
String pathToAudio;
Creating functions for the Flutter audio app
Initializing the app
To initialize our app upon loading, we can create a function called initializer:
 void initializer() async {
    pathToAudio = '/sdcard/Download/temp.wav';
    _recordingSession = FlutterSoundRecorder();
    await _recordingSession.openAudioSession(
        focus: AudioFocus.requestFocusAndStopOthers,
        category: SessionCategory.playAndRecord,
        mode: SessionMode.modeDefault,
        device: AudioDevice.speaker);
    await _recordingSession.setSubscriptionDuration(Duration(
    milliseconds: 10));
    await initializeDateFormatting();
    await Permission.microphone.request();
    await Permission.storage.request();
    await Permission.manageExternalStorage.request();
  }
The path to our recorded audio is given to the variable pathToAudio in this function.
Using openAudioSession, we can start recording on our phone by creating an instance of FlutterSoundRecorder. It’s possible to establish audio focus by using the parameters focus, category, model, and device. To ensure that our app can operate correctly, we must disable any other apps on our phone that can record or play sound. Our subscription duration may then be tracked and updated using setSubscriptionDuration. As a result, it keeps a record of how long each subscriber uses the recorder. Finally, the Permission. microphone. request, Permission.storage.request, and Permission.manageExternalStorage routines allow a request to utilize the phone’s microphone and external storage. Finally, the initializeDateFormatting function lets us format our timer text.
The next step is to include an initializer method in your initState function. This is accomplished by:
  void initState() {
    super.initState();
    initializer();
  }
Managing user rights on Android mobile devices
To provide these rights to our app, further configuration is necessary on Android phones. Navigate to the following and add permissions for recording audio, reading files from the external storage, and storing files to the external storage:
android/app/src/main/AndroidManifest.XML
To access the storage of phones with Android 10 or API level 29, we must set the value of requestLegacyExternalStorage to true:
 <uses-permission android:name="android.permission.RECORD_AUDIO" />
    <uses-permission android:name=
    "android.permission.READ_EXTERNAL_STORAGE" />
    <uses-permission android:name=
    "android.permission.WRITE_EXTERNAL_STORAGE" />
   <application android:requestLegacyExternalStorage="true"
Next, go to your terminal and run the following:
flutter pub add permission_handler
Adding the startRecording() function
We can proceed to create the functions we added to our buttons; the first function is startRecording():
 Future<void> startRecording() async {
    Directory directory = Directory(path.dirname(pathToAudio));
    if (!directory.existsSync()) {
      directory.createSync();
    }
    _recordingSession.openAudioSession();
    await _recordingSession.startRecorder(
      toFile: pathToAudio,
      codec: Codec.pcm16WAV,
    );
    StreamSubscription _recorderSubscription =
        _recordingSession.onProgress.listen((e) {
      var date = DateTime.fromMillisecondsSinceEpoch(
      e.duration.inMilliseconds,
          isUtc: true);
      var timeText = DateFormat('mm:ss:SS', 'en_GB').format(date);
      setState(() {
        _timerText = timeText.substring(0, 8);
      });
    });
    _recorderSubscription.cancel();
  }
It is possible to store our recording to a specific directory using Directory directory = Directory(path.dirname(pathToAudio)). If the directory exists, we may verify it using an if statement. If it doesn’t, we’ll make it from scratch. Finally, using the openAudioSession method, we begin recording. StartRecorder has a startRecorder function that specifies where the audio will be stored and in what format.
Using a stream to monitor data
Monitoring what happens while data is being captured is possible with a stream. To subscribe to events from our recording stream, we utilize the StreamSubscription method.
_recordingSession.onProgress.
While the recording is taking place, you may continue to listen. While this is going on, we’d want to keep track of the passing time in a variable called timeText. After that, we can use the setState function to make changes to our app’s timer. We terminate our membership when we no longer need to keep an eye on the stream.
Adding the stopRecording function
Next, we’ll create the stopRecording function:
  Future<String> stopRecording() async {
    _recordingSession.closeAudioSession();
    return await _recordingSession.stopRecorder();
  }
The closeAudioSession method is used in this function to release the phone’s resources and end the recording session. Then we utilize the stopRecorder method to stop recording.
Adding the play function
Next, we’ll create the play function:
  Future<void> playFunc() async {
    recordingPlayer.open(
      Audio.file(pathToAudio),
      autoStart: true,
      showNotification: true,
    );
  }
The open function is used to start the audio player, giving it the path to the audio, stating that the audio should play automatically, and specifying that a notice shows at the top of the phone screen when audio is playing.
Adding the stopPlay function
Lastly, we’ll create the stopPlay function, inside of which we add the stop method to stop the player:
  Future<void> stopPlayFunc() async {
    recordingPlayer.stop();
  }
Conclusion
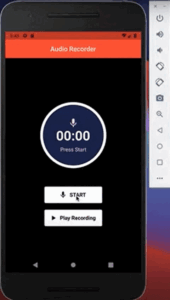
And with that, we have a finalized simple audio recorder and player application:

Below is the final code for everything we just built. Happy coding!
main.dart
Here is the full code for the main.dart file:
import 'dart:async';
import 'dart:io';
import 'package:flutter/cupertino.dart';
import 'package:flutter/material.dart';
import 'package:flutter_sound/flutter_sound.dart';
import 'package:intl/date_symbol_data_local.dart';
import 'package:permission_handler/permission_handler.dart';
import 'package:path/path.dart' as path;
import 'package:assets_audio_player/assets_audio_player.dart';
import 'package:intl/intl.dart' show DateFormat;
void main() {
  runApp(MyApp());
}
class MyApp extends StatelessWidget {
  @override
  Widget build(BuildContext context) {
    return MaterialApp(
      debugShowCheckedModeBanner: false,
      title: 'Flutter Demo',
      theme: ThemeData(
        primarySwatch: Colors.blue,
      ),
      home: MyHomePage(title: 'Flutter Demo Home Page'),
    );
  }
}
class MyHomePage extends StatefulWidget {
  MyHomePage({Key key, this.title}) : super(key: key);
  final String title;
  @override
  _MyHomePageState createState() => _MyHomePageState();
}
class _MyHomePageState extends State<MyHomePage> {
  FlutterSoundRecorder _recordingSession;
  final recordingPlayer = AssetsAudioPlayer();
  String pathToAudio;
  bool _playAudio = false;
  String _timerText = '00:00:00';
  @override
  void initState() {
    super.initState();
    initializer();
  }
  void initializer() async {
    pathToAudio = '/sdcard/Download/temp.wav';
    _recordingSession = FlutterSoundRecorder();
    await _recordingSession.openAudioSession(
        focus: AudioFocus.requestFocusAndStopOthers,
        category: SessionCategory.playAndRecord,
        mode: SessionMode.modeDefault,
        device: AudioDevice.speaker);
    await _recordingSession.setSubscriptionDuration(Duration(milliseconds: 10));
    await initializeDateFormatting();
    await Permission.microphone.request();
    await Permission.storage.request();
    await Permission.manageExternalStorage.request();
  }
  @override
  Widget build(BuildContext context) {
    return Scaffold(
      backgroundColor: Colors.black87,
      appBar: AppBar(title: Text('Audio Recording and Playing')),
      body: Center(
        child: Column(
          mainAxisAlignment: MainAxisAlignment.start,
          children: <Widget>[
            SizedBox(
              height: 40,
            ),
            Container(
              child: Center(
                child: Text(
                  _timerText,
                  style: TextStyle(fontSize: 70, color: Colors.red),
                ),
              ),
            ),
            SizedBox(
              height: 20,
            ),
            Row(
              mainAxisAlignment: MainAxisAlignment.center,
              children: <Widget>[
                createElevatedButton(
                  icon: Icons.mic,
                  iconColor: Colors.red,
                  onPressFunc: startRecording,
                ),
                SizedBox(
                  width: 30,
                ),
                createElevatedButton(
                  icon: Icons.stop,
                  iconColor: Colors.red,
                  onPressFunc: stopRecording,
                ),
              ],
            ),
            SizedBox(
              height: 20,
            ),
            ElevatedButton.icon(
              style:
                  ElevatedButton.styleFrom(elevation: 9.0, primary: Colors.red),
              onPressed: () {
                setState(() {
                  _playAudio = !_playAudio;
                });
                if (_playAudio) playFunc();
                if (!_playAudio) stopPlayFunc();
              },
              icon: _playAudio
                  ? Icon(
                      Icons.stop,
                    )
                  : Icon(Icons.play_arrow),
              label: _playAudio
                  ? Text(
                      "Stop",
                      style: TextStyle(
                        fontSize: 28,
                      ),
                    )
                  : Text(
                      "Play",
                      style: TextStyle(
                        fontSize: 28,
                      ),
                    ),
            ),
          ],
        ),
      ),
    );
  }
  ElevatedButton createElevatedButton(
      {IconData icon, Color iconColor, Function onPressFunc}) {
    return ElevatedButton.icon(
      style: ElevatedButton.styleFrom(
        padding: EdgeInsets.all(6.0),
        side: BorderSide(
          color: Colors.red,
          width: 4.0,
        ),
        shape: RoundedRectangleBorder(
          borderRadius: BorderRadius.circular(20),
        ),
        primary: Colors.white,
        elevation: 9.0,
      ),
      onPressed: onPressFunc,
      icon: Icon(
        icon,
        color: iconColor,
        size: 38.0,
      ),
      label: Text(''),
    );
  }
  Future<void> startRecording() async {
    Directory directory = Directory(path.dirname(pathToAudio));
    if (!directory.existsSync()) {
      directory.createSync();
    }
    _recordingSession.openAudioSession();
    await _recordingSession.startRecorder(
      toFile: pathToAudio,
      codec: Codec.pcm16WAV,
    );
    StreamSubscription _recorderSubscription =
        _recordingSession.onProgress.listen((e) {
      var date = DateTime.fromMillisecondsSinceEpoch(e.duration.inMilliseconds,
          isUtc: true);
      var timeText = DateFormat('mm:ss:SS', 'en_GB').format(date);
      setState(() {
        _timerText = timeText.substring(0, 8);
      });
    });
    _recorderSubscription.cancel();
  }
  Future<String> stopRecording() async {
    _recordingSession.closeAudioSession();
    return await _recordingSession.stopRecorder();
  }
  Future<void> playFunc() async {
    recordingPlayer.open(
      Audio.file(pathToAudio),
      autoStart: true,
      showNotification: true,
    );
  }
  Future<void> stopPlayFunc() async {
    recordingPlayer.stop();
  }
}
AndroidManifest.xml
Here is the final code for the AndroidManifest.xml to configure permissions in Android phones:
<manifest xmlns:android="http://schemas.android.com/apk/res/android"
    package="my.app.audio_recorder">
    <uses-permission android:name="android.permission.RECORD_AUDIO" />
    <uses-permission android:name="android.permission.READ_EXTERNAL_STORAGE" />
    <uses-permission android:name="android.permission.WRITE_EXTERNAL_STORAGE" />
   <application android:requestLegacyExternalStorage="true"
        android:label="audio_recorder"
        android:icon="@mipmap/ic_launcher">
        <activity
            android:name=".MainActivity"
            android:launchMode="singleTop"
            android:theme="@style/LaunchTheme"
            android:configChanges="orientation|keyboardHidden|
            keyboard|screenSize|smallestScreenSize|locale
            |layoutDirection|fontScale|screenLayout|density|uiMode"
            android:hardwareAccelerated="true"
            android:windowSoftInputMode="adjustResize">
pubspec.yaml
Here is the final code for the pubspec.yaml file containing the project’s dependencies:
dependencies:
  flutter:
    sdk: flutter
  cupertino_icons: ^1.0.2
  flutter_sound: ^8.1.9
  permission_handler: ^8.1.2
  path: ^1.8.0
  assets_audio_player: ^3.0.3+3
  intl: ^0.17.0


