Upload Images & Videos to AWS S3 in Flutter
This article will explain how to upload media files such as images and videos into the S3 bucket on Amazon Web Services (AWS) in Flutter apps. This technique provides support for both the Flutter Web and Flutter Mobile platforms (Android and iOS, respectively).
Amazon S3 is an object storage service that is offered by Amazon Web Services and may be accessed by means of a web service interface. This is just a quick review.
Prerequisites for Uploading Files to AWS S3 in Flutter
-
A public bucket in AWS S3.
-
Access token and secret token with access to AWS S3 bucket.
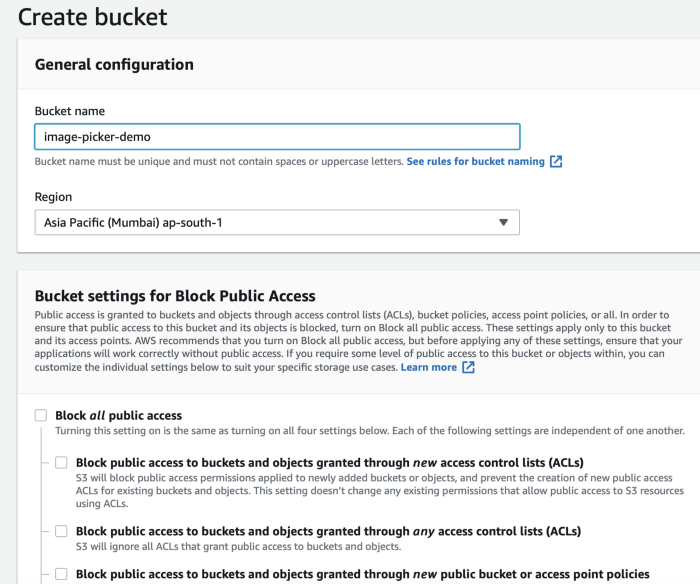
To set up a public bucket, follow these instructions
-
Create an AWS account by logging in or signing up
-
Navigate to AWS S3
-
Create a bucket with public access and geolocation depending on the location of your users.
Mega Bundle Sale is ON! Get ALL of our React Native codebases at 90% OFF discount 🔥
Get the Mega BundleCreate/Get an access token and secret token:
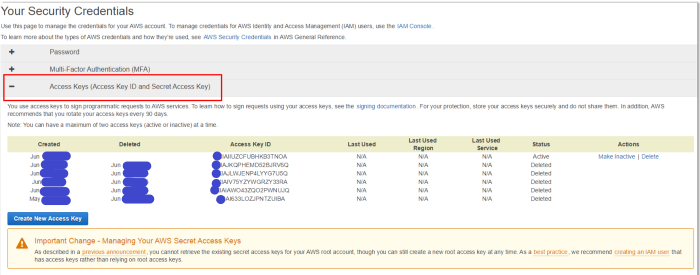
- Go to the Amazon_Web_Services dashboard and choose your account’s name from the drop-down menu (it is located in the top right corner of the console). Once you’ve done that, pick Security_Credentials from the drop-down menu.

- Activate the option for access keys (Access Key ID and Secret Access Key). There is a list of your active and removed access keys in this section.
- You may create new access keys by clicking the Create New Access Key button.
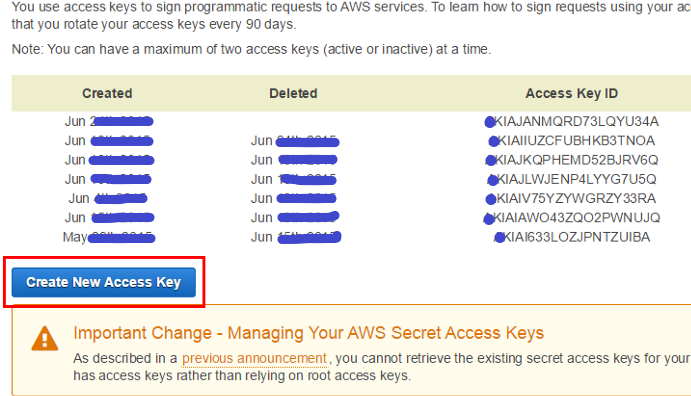
- Simply clicking the Show Access Key button will cause it to appear on the screen. Take note that you may save it to your computer as a file and then access it whenever you find it necessary to do so. Simply clicking the Download Key File button will begin the download process.

Remember: The secret key cannot be retrieved in the future if you do not download the key file to your computer before pressing “Close” or “Cancel.
Now, We have all the prerequisites, let’s start uploading.
What will be used?
Express-based Node.js server.
What method will we use to upload pictures?
-
Request that our NodeJs server provide us with a URL for downloading and uploading files to and from the server.
-
Then, go to the upload URL and upload the picture.
-
Use the download link to see photographs that you’ve saved.
To make the server ready, we need to complete the following steps
-
Download the repository (https://github.com/GursheeshSingh/flutter-aws-s3-upload).
-
Update config-aws.js.
-
Open repository in terminal
-
Install node packages using npm install
-
Run server using npm start
Now that the server is up and operating, we can go to the next step.
Uploading Images to AWS S3 in Flutter
Main.dart
_onAddPhotoClicked(context) async {
  if (permissionStatus == PermissionStatus.granted) {
    print('Permission granted');
    File image = await ImagePicker.pickImage(
      source: ImageSource.gallery,
    );
    if (image != null) {
      String fileExtension = path.extension(image.path);
      _galleryItems.add(
        GalleryItem(
          id: Uuid().v1(),
          resource: image.path,
          isSvg: fileExtension.toLowerCase() == ".svg",
        ),
      );
      setState(() {
        _photos.add(image);
        _photosSources.add(PhotoSource.FILE);
      });
      //Changes started
      GenerateImageUrl generateImageUrl = GenerateImageUrl();
      await generateImageUrl.call(fileExtension);
      String uploadUrl;
      if (generateImageUrl.isGenerated != null &&
          generateImageUrl.isGenerated) {
        uploadUrl = generateImageUrl.uploadUrl;
      } else {
        throw generateImageUrl.message;
      }
      bool isUploaded = await uploadFile(context, uploadUrl, image);
      if (isUploaded) {
        setState(() {
          _photosUrls.add(generateImageUrl.downloadUrl);
        });
      }
      //Changes Ended
    }
  }
}
Future<bool> uploadFile(context, String url, File image) async {
  try {
    UploadFile uploadFile = UploadFile();
    await uploadFile.call(url, image);
    if (uploadFile.isUploaded != null && uploadFile.isUploaded) {
      return true;
    } else {
      throw uploadFile.message;
    }
  } catch (e) {
    throw e;
  }
}
Generate_image_url.dart
class GenerateImageUrl {
    bool success;
    String message;

    bool isGenerated;
    String uploadUrl;
    String downloadUrl;

    Future<void> call(String fileType) async {
      try {
        Map body = {"fileType": fileType};

        var response = await http.post(
          //For IOS
          'http://localhost:5000/generatePresignedUrl',
          //For Android
          //'http://10.0.2.2:5000/generatePresignedUrl',
          body: body,
        );

        var result = jsonDecode(response.body);

        print(result);

        if (result['success'] != null) {
          success = result['success'];
          message = result['message'];

          if (response.statusCode == 201) {
            isGenerated = true;
            uploadUrl = result["uploadUrl"];
            downloadUrl = result["downloadUrl"];
          }
        }
      } catch (e) {
        throw ('Error getting url');
      }
    }
  }
Upload_file.dart
class UploadFile {
  bool success;
  String message;
  bool isUploaded;
  Future<void> call(String url, File image) async {
    try {
      var response = await http.put(url, body: image.readAsBytesSync());
      if (response.statusCode == 200) {
        isUploaded = true;
      }
    } catch (e) {
      throw ('Error uploading photo');
    }
  }
}
Note: Make sure you enter the appropriate URL in the GenerateFileUrl function depending on your emulator.
Mega Bundle Sale is ON! Get ALL of our React Native codebases at 90% OFF discount 🔥
Get the Mega BundleWhat we have done so far?
1.Added library http: ^0.12.0+4 to pubspec.yaml.
-
Called our NodeJs function from GenerateImageUrl to return an upload and download URL as the response.
-
Then store the upload and download URL in our generateImageUrl object instance.
-
Then use the UploadFile object instance in uploadFile function to upload the image to the upload URL.
-
If the upload is successful, we add the download URL to photoUrls list.
Running the Flutter App To Visualize the Outcome
For Android

For IOS

Let’s check our AWS S3 bucket:
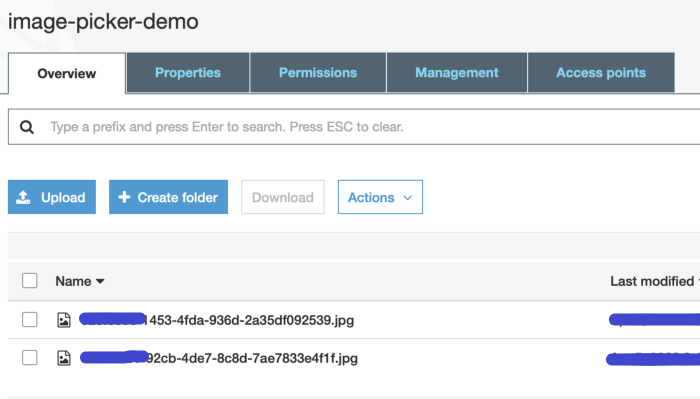
Both of the files that we uploaded are now present in the S3 bucket that we use for AWS.
Looking for a custom mobile application?
Our team of expert mobile developers can help you build a custom mobile app that meets your specific needs.
Get in TouchConclusion
In this tutorial, we learned how to upload media files such as images and video to AWS S3 bucket in Flutter. Let us know in the comments if you encounter any issues.