If you are building a mobile app in Flutter and you are looking to learn how to get the current user location, then this is the tutorial you were looking for.
In the current context, there are numerous applications that make use of the device location service to implement various location-based features in the application. In mobile apps such as delivery app, eCommerce app, booking apps, geolocation apps, etc the location service is very essential. So let’s take a look at how to access the location service of a device to get the current location of the user/device.

In this tutorial, we are going to use the geolocator plugin to access the location service of the device and get the current location coordinates of the user. The geolocator library has made the location service access and getting current location coordinates much easier. The idea is to implement a simple UI template to display the current location and a function to fetch the current location using the geolocator library. So, let’s get started!
Setting up the Flutter Project
First, we need to create a new Flutter project. For that, make sure that the Flutter SDK and other Flutter app development-related requirements are properly installed. If everything is properly set up, then in order to create a project, we can simply run the following command in the desired local directory:
flutter create flutter_location_example
After the project has been set up, we can navigate inside the project directory and execute the following command in the Terminal to run the project in either an available emulator or an actual device:
flutter run
Scaffolding The App Project
Now, we are going to scaffold the project by removing the default template codes. First, we need to remove the default MyHomePage stateful class widget from the main.dart. Then, we need to create a new stateful widget class called CurrentLocation. This class will hold all the UI template code and the functions to get the current location of the user. The overall code is provided in the code snippet below:
class CurrentLocation extends StatefulWidget {
  CurrentLocation({Key key}) : super(key: key);

  @override
  _CurrentLocationState createState() => _CurrentLocationState();
}

class _CurrentLocationState extends State<CurrentLocation> {

  String currentLocation;

  @override
  void initState() {
    super.initState();
  }

  @override
  Widget build(BuildContext context) {
    return Scaffold(
      appBar: AppBar(
        title: Text("Location"),
      ),
      body: SingleChildScrollView(
        child: Container(
          child: Column(
            mainAxisAlignment: MainAxisAlignment.center,
            crossAxisAlignment: CrossAxisAlignment.center,
            children: <Widget>[
              Container(
                  decoration: BoxDecoration(
                    color: Colors.teal[50]
                  ),
                  padding: EdgeInsets.symmetric(horizontal: 16, vertical: 8),
                  child: Column(
                    children: <Widget>[
                      Row(
                        children: <Widget>[
                          Icon(Icons.location_on),
                          SizedBox(
                            width: 8,
                          ),
                          Expanded(
                            child: Column(
                              crossAxisAlignment: CrossAxisAlignment.start,
                              children: <Widget>[
                                Text(
                                  'Location',
                                ),
                                (currentLocation!=null)?Text(currentLocation):Container(),
                              ],
                            ),
                          ),
                          SizedBox(
                            width: 8,
                          ),
                        ],
                      ),
                    ],
                  )),
                  RaisedButton(
                    color: Colors.blue[50],
                    onPressed: (){
                    },
                    child: Text("Get Location"),
                  )
            ],
          ),
        ),
      ),
    );
  }
}
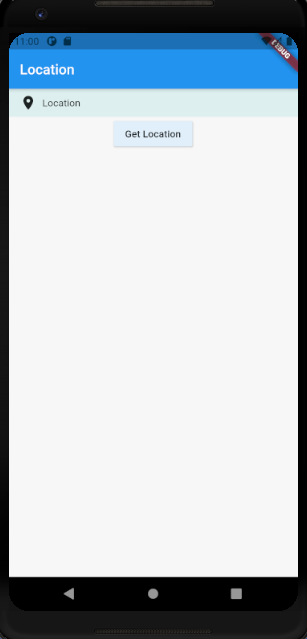
For the template, we have used the Scaffold widget with an App bar and body. The template is simple with the use of a Column widget that houses other widgets. We have kept a Container that will show the location once fetched. Here, we have also used the icon as well. Then, we have RaisedButton whose onPressed event is empty as of now. Later, we are going to assign a function that grabs the current location value and sets the value to the currentLocation variable. Also, the currentLocation value is used as a conditional rendering to show the location value on the template.
Now, we need to call the class widget in the home option of the MaterialApp widget of MyApp stateless class:
class MyApp extends StatelessWidget {
  // This widget is the root of your application.
  @override
  Widget build(BuildContext context) {
    return MaterialApp(
      title: 'Flutter Demo',
      theme: ThemeData(
        primarySwatch: Colors.blue,
      ),
      home: CurrentLocation(),
    );
  }
}
Hence, we will get the following result on the emulator screen:
Installing the Geolocator Package
Now, we need to install the package called geolocator that enables us to fetch the location and play around with it. This library provides easy access to platform-specific location services. It offers a cross-platform (iOS, Android) API for generic location (GPS, etc.) functions. Now in order to install this library, we need to add the geolocator to pubspec.yaml file as shown in the code snippet below:
dependencies:
  flutter:
    sdk: flutter

  geolocator: ^7.0.1
Make sure to upgrade the Flutter/Dart SDK if this plugin does not work.
Now, there are some configurations that need to be done so that our Flutter app can use the plugin properly.
First, the geolocator plugin requires the AndroidX version of the Android Support Libraries. Hence, we need to add these support libraries to gradle.properties file of ./android folder as directed in the code snippet below:
android.useAndroidX=true
android.enableJetifier=true
Then, we need to make sure that we set the compileSdkVersion in our ./android/app/build.gradle file to 30:
android {
  compileSdkVersion 30
  ...
}
Now in order for our Flutter app to access location service from the device, we need to add certain permissions first. For location service to work, we need to add the ACCESS_COARSE_LOCATION and the ACCESS_FINE_LOCATION permission to our AndroidManifest.xml file. To add these permissions, we need to go to ./android/app/src/main/AndroidManifest.xml file and add these permissions as a direct child of <manifest> tag:
<uses-permission android:name="android.permission.ACCESS_FINE_LOCATION" />
<uses-permission android:name="android.permission.ACCESS_COARSE_LOCATION" />
For Android 10, it will beneficial to add ACCESS_BACKGROUND_LOCATION permission as well. This permission will enable the app to keep receiving updates even when our app is running in the background:
<uses-permission android:name="android.permission.ACCESS_BACKGROUND_LOCATION" />
Hence, we have successfully applied all the necessary configurations to use the geolocator plugin in our Flutter app.
Getting the User Location in Flutter
Now, we are going to implement a function that checks for permissions if the app can use the location service of the device or not and then return the current location of the device or user.
First, we need to initialize a Position instance variable that will hold the location position value. Then, we can use the LocationPermission instance provided by the geolocator plugin to check the permission. First, we check if the permission to use location is already available for the app using the checkPermission() method provided by the geolocator plugin. If not then, we request to grant permission using requestPremission() method. If we manually deny the permission then, we assign permission denied value to currentLocation else we fetch the current position value using the getCurrentPosition method and assign it to the position variable. Now, the position variable will hold the latitude and longitude value which we can set to the currentLocation variable.
The overall Flutter code for this is provided in the code snippet below:
Position position;

  void _getCurrentLocation() async {
    LocationPermission permission;

    permission = await Geolocator.checkPermission();
    if (permission == LocationPermission.denied) {
      permission = await Geolocator.requestPermission();
      if (permission == LocationPermission.denied) {
        setState(() {
          currentLocation ="Permission Denied";
        });
      }else{
        var position = await Geolocator.getCurrentPosition(desiredAccuracy: LocationAccuracy.high);
        setState(() {
          currentLocation ="latitude: ${position.latitude}" + " , " + "Logitude: ${position.longitude}";
        });
      }
    }else{
      var position = await Geolocator.getCurrentPosition(desiredAccuracy: LocationAccuracy.high);
      setState(() {
        currentLocation ="latitude: ${position.latitude}" + " , " + "Logitude: ${position.longitude}";
      });
    }
  }
Lastly, we need to assign this function to the onPressed event of the RaisedButton widget that we implemented earlier in the template:
RaisedButton(
  color: Colors.blue[50],
  onPressed: (){
    _getCurrentLocation();
  },
  child: Text("Get Location"),
)
Hence, the overall demo of getting the current user location of the device/user is shown in the simulation below:
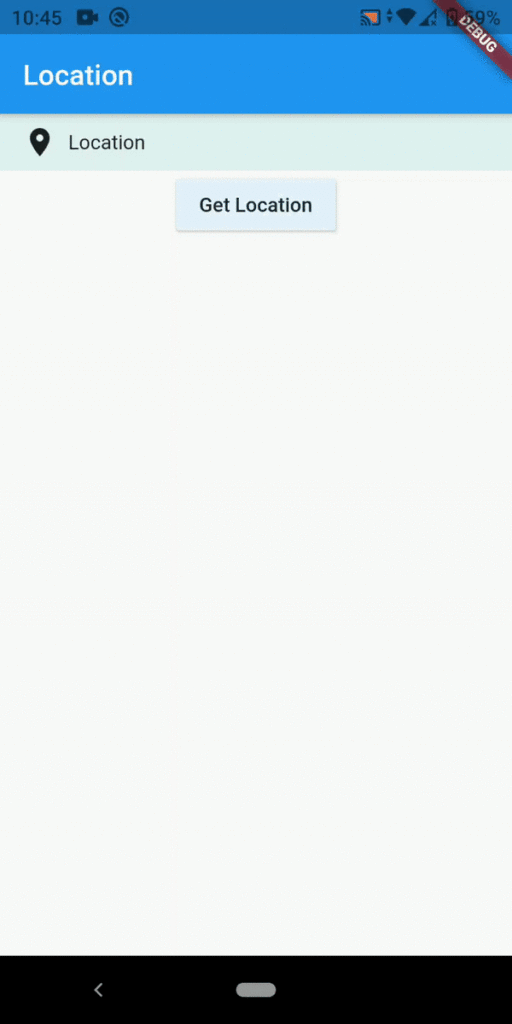
As we can notice, once we tap on the “Get location” button, we will be asked if the permission of the device’s location service is to be provided to the app. If allowed, the location position values are displayed on the screen.
Conclusion
The main objective of this tutorial was to demonstrate how to fetch the current location position of the user or device by using the geolocator package. The availability of this geolocator package made the whole process easier for us. The plugin is capable of much in terms of working with location values and whatnot. We can get the last known location, current location, continuous location updates, check for location permissions, calculate the distance between the locations and bearing. Now, the challenge is to use these features provided by the plugin to create location-centric Flutter applications.

