Flutter is a wonderful framework for designing applications that can run on different platforms while using a single codebase. Much if Flutter is helpful when combined with Firebase, it becomes even more powerful: In this post, I want to discuss Firebase Authentication and how it can be utilized using the FlutterFire plugin. Specifically, I will focus on how it may be used. I will focus on the two primary methods of authentication that you may implement in your apps:
• encrypted email with a passphrase
• Authentication via emailed links
It is important to note that while Firebase Authentication ought to work with Flutter online apps, the primary emphasis of this article will be on implementing it, especially inside mobile applications.
Flutter App Setup
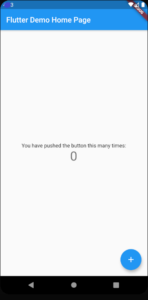
First things first: before we can begin diving deep into putting Firebase Authentication into action, let’s get a simple example app up and running and get it up and going. You should begin by determining whether or not the environment for our work is already correctly configured on your end. This should be the first thing you do. Working with Android Studio and testing with the Android emulator is going to be the primary focus of my attention so that I can make things as simple as is humanly feasible. If you haven’t already done so, you can find instructions for setting up Flutter for Android Studio on this page. You should be able to create a rudimentary “Hello World” program by the time you’re done, and it should have the structure that is outlined here:
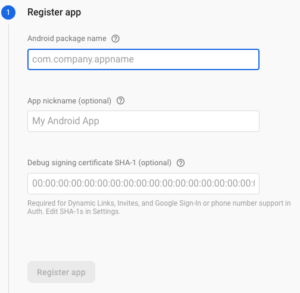
Once you’ve built your first Flutter app, you’ll need to set up Firebase. The official Firebase documentation provides instructions on how to do this. Include your SHA-1 key when adding your Android app to the Firebase interface (you can find instructions on how to get your SHA-1 key in Android’s official documentation). When utilizing Google Sign-In with Email Link authentication, you’ll need to do this.
Additionally, when you get to the stage in the process when you are adding firebase core and firebase analytics to your pubspec.yaml file, go ahead and add the following two lines to your dependencies block in order to import firebase authentication and firebase dynamic links:
firebase_auth: ^0.14.0+5
firebase_dynamic_links: ^0.5.1
It’s time to pick Packages and have your software installed.
![]()
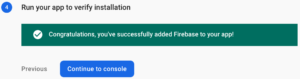
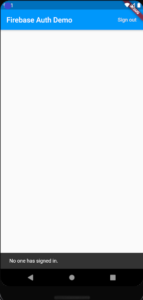
Once you’ve completed the initial setup of your app, you should see a screen similar to the one below if everything went according to plan:
To demonstrate the various Firebase authentication mechanisms available in Flutter, we’ll develop an example app from the ground up for the remainder of this tutorial.
Setting up the screen
Main.dart will house all of our code for registering new users and signing in already registered ones. To change the content of this file, you may do so as follows:
//1
import 'package:flutter/material.dart';
import 'package:firebase_auth/firebase_auth.dart';
import 'package:firebase_dynamic_links/firebase_dynamic_links.dart';

//2
final FirebaseAuth _auth = FirebaseAuth.instance;

void main() {
  runApp(MyApp());
}

//3
class MyApp extends StatelessWidget {

  @override
  Widget build(BuildContext context) {
    return MaterialApp(
      title: 'Firebase Auth Demo',
      home: MyHomePage(title: 'Firebase Auth Demo'),
    );
  }
}

class MyHomePage extends StatefulWidget {
  MyHomePage({Key key, this.title}) : super(key: key);
  final String title;
  @override
  _MyHomePageState createState() => _MyHomePageState();
}

class _MyHomePageState extends State<MyHomePage> {

//4
  @override
  Widget build(BuildContext context) {
    return Scaffold(
      appBar: AppBar(
        title: Text(widget.title),
        actions: <Widget>[
          Builder(builder: (BuildContext context) {
//5
            return FlatButton(
              child: const Text('Sign out'),
              textColor: Theme
                  .of(context)
                  .buttonColor,
              onPressed: () async {
                final FirebaseUser user = await _auth.currentUser();
                if (user == null) {
//6
                  Scaffold.of(context).showSnackBar(const SnackBar(
                    content: Text('No one has signed in.'),
                  ));
                  return;
                }
                await _auth.signOut();
                final String uid = user.uid;
                Scaffold.of(context).showSnackBar(SnackBar(
                  content: Text(uid + ' has successfully signed out.'),
                ));
              },
            );
          })
        ],
      ),
      body: Builder(builder: (BuildContext context) {
//7
        return ListView(
          scrollDirection: Axis.vertical,
          padding: const EdgeInsets.all(16),
          children: <Widget>[
            //TODO: UI widgets will go here.
          ],
        );
      }),
    );
  }
}
Let’s take a closer look at what’s going on in this situation. For the most part, we’ll be relying on the imports listed first in class (1).
• Widgets with Material-based views are created using the material.
• Firebase Authentication is built on the foundation of firebase auth.
• Email link authentication will make use of firebase dynamic links.
A FirebaseAuth object instance may be found below the imports (2). The Firebase backend and your app will communicate with each other using this to keep track of your app’s users.
_MyHomePageState’s construct (4) function is more intriguing than the two blocks (3), MyApp and MyHomePage, which are both conventional Flutter structures. A user may sign out by clicking the sign-out button on the AppBar, which has just one FlatButton (5) on it. When the user touches the button, a Snackbar (6) message will appear to inform the user that they are not presently authorized.
In the ListView (7) which serves as the last stage of the building process, each section of this article will be represented by a different widget in the form of an array.
Authentication with the use of an Email Address and Password
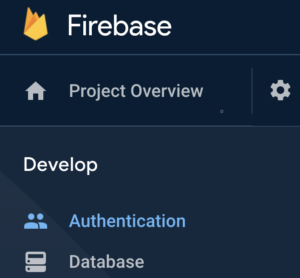
Regarding our illustrative app, we are at last prepared to go on to the more exciting parts:) To get started using the Firebase Console, go to the left navigation pane and choose the Authentication tab.
Select the Sign-in Methods to tab from the Authentication page.
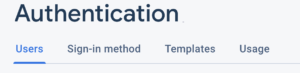
There are a lot of different ways to sign in to your Firebase account, and we’ll be coming to this page a lot in this tutorial.
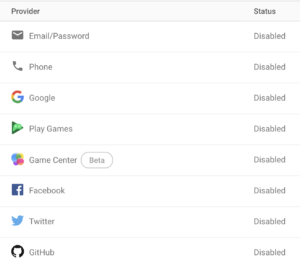
Please enable email/password synchronization for the time being. toggle for an email link may also be found (passwordless sign-in). Passwordless sign-in is the next sort of authentication we’ll learn about, so go ahead and turn it on. You may save your progress by clicking the blue save button while both of those toggles are active.
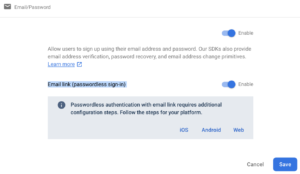
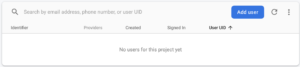
The Users tab is now empty, as may be seen by returning there. Let’s go ahead and make that modification now.
Creating an account using an email address and password
Open the main Dart file in Android Studio once again. To sign up for Firebase, we’ll be adding a form to this file that will ask users for their email addresses and password. In order to begin, you may add these classes:
class _RegisterEmailSection extends StatefulWidget {
  final String title = 'Registration';
  @override
  State<StatefulWidget> createState() =>
      _RegisterEmailSectionState();
}
class _RegisterEmailSectionState extends State<_RegisterEmailSection> {
@override
  Widget build(BuildContext context) {
    //TODO UI content here
  }
}
The _RegisterEmailSectionState class will handle the remainder of the registration process. Add the following code to the class’s head:
class's head:
class _RegisterEmailSection extends StatefulWidget {
  final String title = 'Registration';
  @override
  State<StatefulWidget> createState() =>
      _RegisterEmailSectionState();
}
class _RegisterEmailSectionState extends State<_RegisterEmailSection> {
@override
  Widget build(BuildContext context) {
    //TODO UI content here
  }
}
The _RegisterEmailSectionState class will handle the remainder of the registration process. Add the following code to the class’s head:
final GlobalKey<FormState> _formKey = GlobalKey<FormState>();
final TextEditingController _emailController = TextEditingController();
final TextEditingController _passwordController = TextEditingController();
bool _success;
String _userEmail;
In order to verify that the user has input the correct email address and password, the GlobalKeyFormState> object is utilized, as are both TextEditingControllers. For the purposes of this screen, the values of the attributes _success and _userEmail will be utilized to monitor the current status.
The registration UI is the next phase in this example app’s development. You may just replace the whole build procedure with the following code, which is not directly connected to Firebase authentication:
@override
Widget build(BuildContext context) {
return Scaffold(
appBar: AppBar(
title: Text(widget.title),
),
body: Form(
key: _formKey,
child: Column(
crossAxisAlignment: CrossAxisAlignment.start,
children: <Widget>[
TextFormField(
controller: _emailController,
decoration: const InputDecoration(labelText: 'Email'),
validator: (String value) {
if (value.isEmpty) {
return 'Please enter some text';
}
return null;
},
),
TextFormField(
controller: _passwordController,
decoration: const InputDecoration(labelText:
'Password'),
validator: (String value) {
if (value.isEmpty) {
return 'Please enter some text';
}
return null;
},
),
Container(
padding: const EdgeInsets.symmetric(vertical: 16.0),
alignment: Alignment.center,
child: RaisedButton(
onPressed: () async {
if (_formKey.currentState.validate()) {
_register();
}
},
child: const Text('Submit'),
),
),
Container(
alignment: Alignment.center,
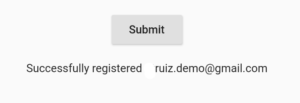
child: Text(_success == null
? ''
: (_success
? 'Successfully registered ' + _userEmail
: 'Registration failed')),
)
],
),
),
);
}
_register() is an undefined method in the given code sample, which is why the code is incomplete. When creating a user, the most crucial element of registration is the call to FlutterFire Authentication’s createUserWithEmailAndPassword function, which retrieves the information from the form and sends it to Firebase. _success and _userEmail will need to be updated when this call returns.
void _register() async {
  final FirebaseUser user = (await
      _auth.createUserWithEmailAndPassword(
        email: _emailController.text,
        password: _passwordController.text,
      )
  ).user;
  if (user != null) {
    setState(() {
      _success = true;
      _userEmail = user.email;
    });
  } else {
    setState(() {
      _success = true;
    });
  }
}
A Firebase account was created with only a single call to createUserWithEmailAndPassword():) In this class, we’ll add a method for cleaning up some of our components when the program is put into the background or closed by the user.
@override
void dispose() {
  _emailController.dispose();
  _passwordController.dispose();
  super.dispose();
}
Finally, we’ll put our newly constructed widget on display. Replace the note /TODO: UI widgets will go here in the build function of _MyHomePageState with _RegisterEmailSection in the ListView (),.
It’s time to start our app now that the registration page has been completed. Upon launching the app, you should be greeted with two new text boxes.
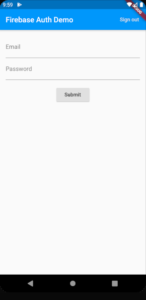
Please enter your email address and password. Once you’ve pressed the submit button, you should get a confirmation message telling you that your email address has been registered successfully.
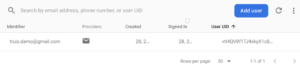
If you go back to the Authentication page and click on the Users tab, you should now be able to view the email in the Firebase Console.
Login with Email and Password
Learn how to sign people in using an email and password now that you have a registered user. Adding two additional classes to the main.dart file is fine:
class _EmailPasswordForm extends StatefulWidget {
  @override
  State<StatefulWidget> createState() => _EmailPasswordFormState();
}
class _EmailPasswordFormState extends State<_EmailPasswordForm> {
  @override
  Widget build(BuildContext context) {
    //TODO
  }
}
Please replace the whole _EmailPasswordFormState class with this code so that we can examine it in detail. I’ll point out essential elements of this class to make it easier to understand.
class _EmailPasswordFormState extends State<_EmailPasswordForm> {
  final GlobalKey<FormState> _formKey = GlobalKey<FormState>();
  final TextEditingController _emailController = TextEditingController();
  final TextEditingController _passwordController = TextEditingController();
  bool _success;
  String _userEmail;
  @override
  Widget build(BuildContext context) {
    return Form(
      key: _formKey,
      child: Column(
        crossAxisAlignment: CrossAxisAlignment.start,
        children: <Widget>[
          Container(
            child: const Text('Test sign in with email and password'),
            padding: const EdgeInsets.all(16),
            alignment: Alignment.center,
          ),
          TextFormField(
            controller: _emailController,
            decoration: const InputDecoration(labelText: 'Email'),
            validator: (String value) {
              if (value.isEmpty) {
                return 'Please enter some text';
              }
              return null;
            },
          ),
          TextFormField(
            controller: _passwordController,
            decoration: const InputDecoration(labelText: 'Password'),
            validator: (String value) {
              if (value.isEmpty) {
                return 'Please enter some text';
              }
              return null;
            },
          ),
          Container(
            padding: const EdgeInsets.symmetric(vertical: 16.0),
            alignment: Alignment.center,
            child: RaisedButton(
              onPressed: () async {
                if (_formKey.currentState.validate()) {
                  _signInWithEmailAndPassword();
                }
              },
              child: const Text('Submit'),
            ),
          ),
          Container(
            alignment: Alignment.center,
            padding: const EdgeInsets.symmetric(horizontal: 16),
            child: Text(
              _success == null
                  ? ''
                  : (_success
                  ? 'Successfully signed in ' + _userEmail
                  : 'Sign in failed'),
              style: TextStyle(color: Colors.red),
            ),
          )
        ],
      ),
    );
  }
  @override
  void dispose() {
    _emailController.dispose();
    _passwordController.dispose();
    super.dispose();
  }
_signInWithEmailAndPassword is a new method in the aforementioned class that the submit button calls (). The FirebaseUser object may be retrieved using this method, which accepts an email address and a password for authentication.
void _signInWithEmailAndPassword() async {
  final FirebaseUser user = (await _auth.signInWithEmailAndPassword(
    email: _emailController.text,
    password: _passwordController.text,
  )).user;

  if (user != null) {
    setState(() {
      _success = true;
      _userEmail = user.email;
    });
  } else {
    setState(() {
      _success = false;
    });
  }
}
Add this widget to your main ListView so that it will appear in your UI:
body: Builder(builder: (BuildContext context) {
  return ListView(
    scrollDirection: Axis.vertical,
    padding: const EdgeInsets.all(16),
    children: <Widget>[
      _RegisterEmailSection(),
      _EmailPasswordForm(),
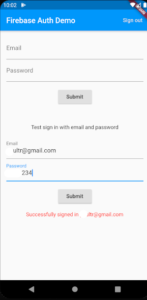
That was a lot of work, but congratulations on getting this far! A working example application that allows new users to be registered and signed in using email and password should be available at this time. You should be able to access the sign-in page and log in using your account credentials if you launch your app.
Conclusion
Congratulations! Your Flutter app has successfully merged with Firebase Authentication. In addition to providing the underlying infrastructure for user authentication, the specified methods of auto-login and email verification are provided by Firebase Authentication. Firebase Authentication may also be integrated with a variety of identity providers, such as Google, Facebook, Twitter, and Apple, among many others.