Secure and relevant data can only be shown to users who have been authenticated by a mobile application. It’s fortunate that Firebase, a backend service, offers User authentication as well as a slew of other important backend services, such as Google Drive. You’ll need to link Firebase with your Flutter app if you want to utilize the Firebase User Authentication Backend Service.
Let us now begin.
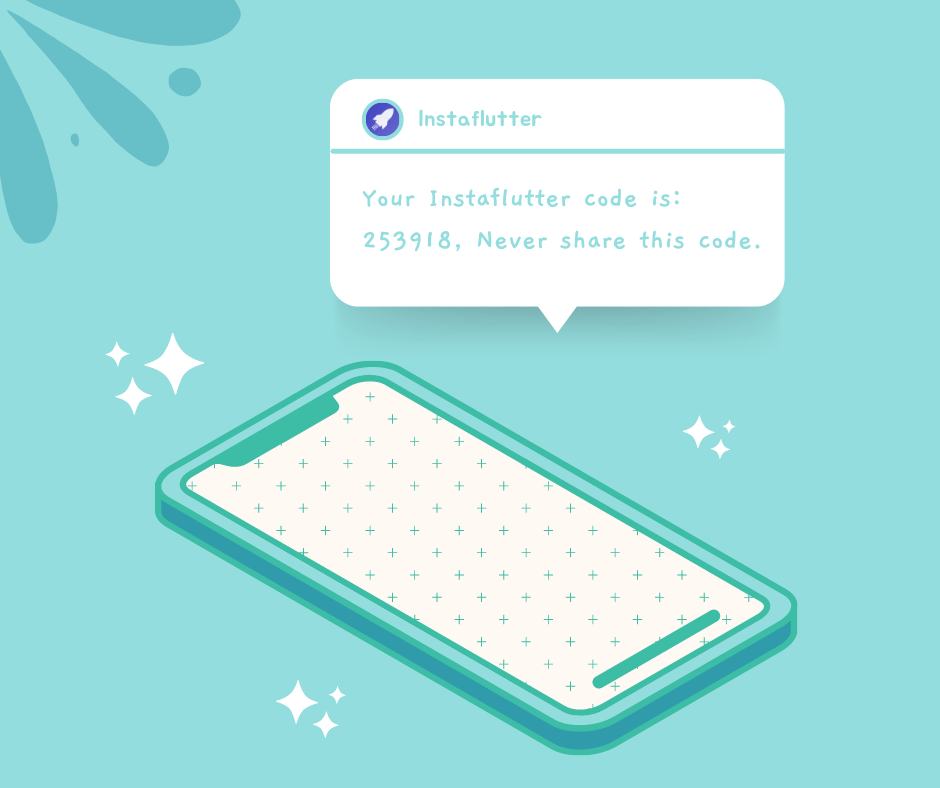
It’s possible to verify or authenticate your user identity in a variety of methods using Firebase Authentication. These include using your email address and password as well as your phone number. However, the focus of this essay is on mobile phone verification as a means of confirming the identity of the user. Once the OTP Code (One Time Password) is sent to the user’s device, Firebase retrieves the code automatically or allows the user to manually enter it to verify their identity (If auto retrieval does not work on a particular device).
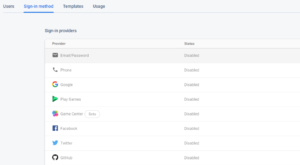
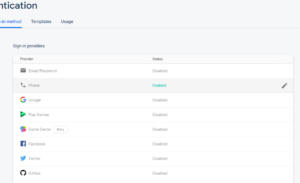
Activating the Phone Sign-in Method.
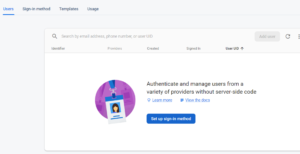
Once you’ve created a Firebase project in the Firebase interface and integrated it with Flutter, you must activate the phone sign-up method first before you can use it. To do this, open the Authentication tab on the left side of the Firebase interface. Enable phone verification by clicking the Setup Signup method.
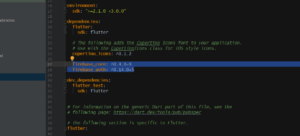
Open the pubspec.yaml file and make sure that the Firebase Authentication and Firebase Core plugins have been added to the list.
That is really exciting news! Let’s begin by discussing the user interface of the program (UI). The app would only need to feature two screens, the Login Screen and the Home Screen, in order for the user to be able to log in. Once the user’s identity has been verified, the Home Screen will be shown. When a user makes their first use of Mobile verification, Firebase automatically registers that user in the authentication data. However, when a user does not make their first use of Mobile verification, Firebase merely verifies the user by sending a message to the user. This raises the question of where the registration screen might be located. The code for the home screen and the login screen is provided below.
LoginScreen.dart
class LoginScreen extends StatelessWidget {
  final _phoneController = TextEditingController();
  final _passController = TextEditingController();
  //Place A
  @override
  Widget build(BuildContext context) {
    return Scaffold(
        body: Container(
          padding: EdgeInsets.all(32),
          child: Form(
            child: Column(
              crossAxisAlignment: CrossAxisAlignment.start,
              mainAxisAlignment: MainAxisAlignment.center,
              children: <Widget>[
                Text("Login", style: TextStyle(color: Colors.lightBlue, fontSize: 36, fontWeight: FontWeight.w500),),

                SizedBox(height: 16,),

                TextFormField(
                  decoration: InputDecoration(
                      enabledBorder: OutlineInputBorder(
                          borderRadius: BorderRadius.all(Radius.circular(8)),
                          borderSide: BorderSide(color: Colors.grey[200])
                      ),
                      focusedBorder: OutlineInputBorder(
                          borderRadius: BorderRadius.all(Radius.circular(8)),
                          borderSide: BorderSide(color: Colors.grey[300])
                      ),
                      filled: true,
                      fillColor: Colors.grey[100],
                      hintText: "Phone Number"

                  ),
                  controller: _phoneController,
                ),

                SizedBox(height: 16,),

                TextFormField(
                  decoration: InputDecoration(
                      enabledBorder: OutlineInputBorder(
                          borderRadius: BorderRadius.all(Radius.circular(8)),
                          borderSide: BorderSide(color: Colors.grey[200])
                      ),
                      focusedBorder: OutlineInputBorder(
                          borderRadius: BorderRadius.all(Radius.circular(8)),
                          borderSide: BorderSide(color: Colors.grey[300])
                      ),
                      filled: true,
                      fillColor: Colors.grey[100],
                      hintText: "Password"

                  ),

                  controller: _passController,
                ),

                SizedBox(height: 16,),

                Container(
                  width: double.infinity,
                  child: FlatButton(
                    child: Text("Login"),
                    textColor: Colors.white,
                    padding: EdgeInsets.all(16),
                    onPressed: (){
                        //code for sign in
                        Place B
                    },
                    color: Colors.blue,
                  ),
                )
              ],
            ),
          ),
        )
    );
  }
}
Home Screen
import 'package:firebase_auth/firebase_auth.dart';
import 'package:flutter/material.dart';

class HomeScreen extends StatelessWidget {

  final FirebaseUser user;

  HomeScreen({this.user});

  @override
  Widget build(BuildContext context) {
    return Scaffold(
      body: Container(
        padding: EdgeInsets.all(32),
        child: Column(
          mainAxisAlignment: MainAxisAlignment.center,
          crossAxisAlignment: CrossAxisAlignment.start,
          children: <Widget>[
            Text("You are Logged in succesfully", style: TextStyle(color: Colors.lightBlue, fontSize: 32),),
            SizedBox(height: 16,),
            Text("${user.phoneNumber}", style: TextStyle(color: Colors.grey, ),),
          ],
        ),
      ),
    );
  }
}
Now that we’ve finished with the user interface (UI) element, we can go on to the major item, which is verifying users based on the mobile phone numbers they provide.
Create a Future that may be used to validate the user’s credentials inside the LoginScreen class located at Place A.
Future registerUser(String mobile, BuildContext context) async{
//code
}
Now let’s begin by establishing the instance of Firebase auth that will be included inside the Future.
Future registerUser(String mobile, BuildContext context) async{

  FirebaseAuth _auth = FirebaseAuth.instance;
}
Verifying a user’s identity using their cell phone is now possible thanks to a new feature offered by Firebase Authentication called verifyPhoneNumber.
Future registerUser(String mobile, BuildContext context) async{
  FirebaseAuth _auth = FirebaseAuth.instance;
  _auth.verifyPhoneNumber(
    phoneNumber: null,
    timeout: null,
    verificationCompleted: null,
    verificationFailed: null,
    codeSent: null,
    codeAutoRetrievalTimeout: null
  );
}
In the verifyPhoneNumber, the phoneNumber is the user’s mobile phone number, and timeout is the amount of time before the verification code given to the device expires (in seconds). Once the verification has been performed successfully, a call to verficationCompleted will be received in the callback. verification It’s possible for the verification to fail because of an invalid code or phone number. code Sent is a callback that gets called once the code is sent to the device. The last callback to be aware of is codeAutoRetrievalTimeout, which is triggered when the timer for automatic code retrieval expires.
Here are the phoneNumber and timeout parameters.
Future registerUser(String mobile, BuildContext context) async{

  FirebaseAuth _auth = FirebaseAuth.instance;

  _auth.verifyPhoneNumber(
    phoneNumber: mobile,
    timeout: Duration(seconds: 60),
    verificationCompleted: null,
    verificationFailed: null,
    codeSent: null,
    codeAutoRetrievalTimeout: null
  );
}
This callback is only fired if the verification is successfully done using Auto Retrieval, so let’s get that out of the way first (without the need for user input).
/...
timeout: Duration(seconds: 60),
verificationCompleted: (AuthCredential authCredential){
//code for signing in
}).catchError((e){
  print(e);
});
},
verificationFailed: null,
To sign in, utilize the authCredential object that is returned in this callback. You must use the signInWithCredential Future offered by Firebase Authentication in order to sign in using authCredential.
//...
timeout: Duration(seconds: 60),
verificationCompleted: (AuthCredential authCredential){
_auth.signInWithCredential(_credential).then((AuthResult result){
Navigator.pushReplacement(context, MaterialPageRoute(
    builder: (context) => HomeScreen(result.user)
  ));
}).catchError((e){
  print(e);
});
},
verificationFailed: null,
//...
We can utilize the user instance supplied by Firebase authentication to sign in using signInWithCredential and then return to the app’s home screen. As a further step, let’s talk about how to verify.
Please try again. As soon as the verification fails, this callback will be triggered and you will be given the AuthException object, which can be used to see what the problem is or to inform your user of the error.
//...
verificationFailed: (AuthException authException){
  print(authException.message);
},
//...
Let’s begin by defining the callback for codeSent. As previously indicated, auto retrieval may not function properly on certain devices. So we need to manually ask the user to enter the code he got on the device by displaying some dialog in codeSent, and then we need to manually construct the AuthCredential object that we received in the verificationCompleted callback from Firebase .
//...
codeSent: (String verificationId, [int forceResendingToken]){
  //show dialog to take input from the user
}
//...
The verification id issued by Firebase for each code, which you get in the codeSent from Firebase, and the OTP Code received by the user is required to create the AuthCredential. As a result, we may display a dialog box for the user to enter their OTP Code.
//...
codeSent: (String verificationId, [int forceResendingToken]){
  //show dialog to take input from the user
  showDialog(
  context: context,
  barrierDismissible: false,
  builder: (context) => AlertDialog(
    title: Text("Enter SMS Code"),
    content: Column(
      mainAxisSize: MainAxisSize.min,
      children: <Widget>[
        TextField(
          controller: _codeController,
        ),

      ],
    ),
    actions: <Widget>[
      FlatButton(
        child: Text("Done"),
        textColor: Colors.white,
        color: Colors.redAccent,
        onPressed: () {
          FirebaseAuth auth = FirebaseAuth.instance;

          smsCode = _codeController.text.trim();

          _credential = PhoneAuthProvider.getCredential(verificationId: verificationId, smsCode: smsCode);
          auth.signInWithCredential(_credential).then((AuthResult result){
            Navigator.pushReplacement(context, MaterialPageRoute(
              builder: (context) => HomeScreen(result.user)
            ));
          }).catchError((e){
            print(e);
          });
        },
      )
    ],
  )
);
}
//...
To create an AuthCredential using the verification code and the one-time password that the user got, we used the code below.
PhoneAuthProvider.getCredential(verificationId: verificationId, smsCode: smsCode);
Finally, specify the CodeAutoRetrievalTimeout, which is invoked when Code Auto Retrieval has run out of memory. Printing an acknowledgment that the Auto retrieval time has expired is all we are doing at this point.
//...
codeAutoRetrievalTimeout: (String verificationId){
  verificationId = verificationId;
  print(verificationId);
  print("Timeout");
};
//...
Our Future for user registration or login has been completed, and now we need to call it in our Login Screen at Place B when the FlatButton onPressed is pressed.
//...
Container(

                  width: double.infinity,
                  child: FlatButton(

                    child: Text("Login"),

                    textColor: Colors.white,

                    padding: EdgeInsets.all(16),

                    onPressed: (){

                        //code for sign in

                        final mobile = _phoneController.text.trim();

                        registerUser(mobile, context);

                    },

                    color: Colors.blue,

                  ),

                )

//...
…and thus we are done!
That’s merely a mobile-specific version of User’s Authentication underlying.NET functionality. Adding basic validation and storing extra information like the display name and display picture with the user would improve the experience.
Thanks.